Check this out...
And did any observant readers notice that the title of the book is "Laura"? How cool is that!?!?
( I picked up the book years ago because of the title. I don't remember the story being memorable, but I'm glad I held on to it because it's the perfect new Kindle cover for me!)
Okay, now do you want to see how easy it was to make? It's totally no-sew and costs only a few dollars!
Here's what you'll need:
- approx. 1/3 yard quilted fabric (mine was reversible)
- 3/8" iron on adhesive tape ( I used Heat n Bond
)
- 3/8" elastic
- hard cover book that's a bit bigger than your Kindle
- glue gun (not pictured!)
Here's what to do:
(Don't be overwhelmed by the ton of pictures and steps, it's not hard! I just tried to show each step because I couldn't give measurements since each book will be a different size!)
1. Cut the pages out of your book. I just used a sharp knife to cut down either side of the spine.
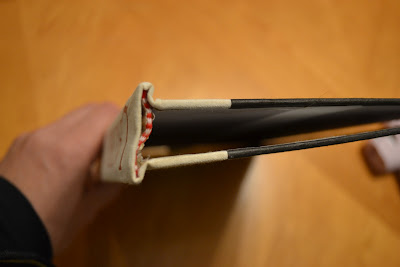
2. (Optional) My book was quite a bit thicker than my Kindle, so I ran some hot glue down the edges of the spine and pushed it together to make it a little bit narrower.
 |
| See how it's not as thick as the original book now? |
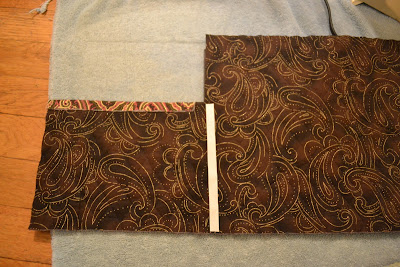
3. Lay your cover open flat and cut your fabric about 1/2" longer than your book, and a little more than one and a half times as wide.
 | ||||||
| See how there's extra fabric? That will make your pocket. |
4. Put your Kindle on the book and decide how tall you want your pocket to be so your Kindle fits in, but you can still easily pull it out. Then add 1/2", and cut across.
5. Put your iron on tape across the top of your pocket piece and iron in place.
6. Then cut 1/2" slit at the end of the tape, remove the paper backing, and iron down 1/2" hem.
(NOTE: You could probably just use hot glue for this too, but I liked how the iron on tape gave me nice straight edges)
 |
| See how the iron on hem finishes off the top of the pocket? |
7. Okay, now we're going to get the first side ready. Cut another 1/2" slit at the top of your pocket so you can finish off the top part of the edge.
8. Turn your fabric over, put the iron on tape along that top part of the edge, and iron down a 1/2" hem.
 |
| Like how I get lazy and use a towel instead of dragging out my ironing board? |
9. Now with the fold of the pocket and the hem on the top part, the left side is finished off.
10. Put another strip of iron on tape along the left edge, remove the paper and iron the left side of the pocket down. (This helps keep your device in a little bit from the outside edge of the cover)
11. Next, put your Kindle in the pocket and decide where its right edge will be so it's a snug fit. Add 1" to that mark and cut your fabric.
12. Put your iron on tape on your new cut edge, then iron down a 1/2" hem.
13. Okay, you're almost finished with the pocket! Just put the iron on tape on the side and bottom of your pocket, peel off the paper backing and iron in place.
14. Next, let's finish off the bottom edge! Just turn your fabric over, put iron on tape along the bottom edge, peel off the paper backing and iron down a 1/2" hem.
15. Now get that hot glue gun warmed up and let's start attaching our fabric to our book. ( I decided to glue down two sides, then finish the rest of the edges so it fit the cover perfectly, instead of trying to measure and get everything lined up right). Glue the left and bottom finished edges to the inside cover of your book making sure the fabric is nicely lined up on the edges. I glued down the edges and also put some glue to attach the fabric to the inside cover.
NOTE: Don't glue all the way to the top on the left hand side, you still have to finish off that top edge.
16. Next, flip your book over and put the iron on tape along the edge of the right side of the book. Cut off any extra fabric, then iron down your 1/2" hem.
17. Do the same thing along the top edge of your book ~ put down the iron on tape, and iron down your 1/2" hem.
18. Now that your fabric inside has all the edges finished and is the exact size of your book cover, hot glue the rest of it in place. Your front cover should be pretty much glued down, so just glue the fabric to the spine, the inside of the back cover and the right and top edges.
19. Now you're really almost finished! Place your Kindle on the right side opposite the pocket, and cut 4 pieces of the elastic. Position them so they'll hold the corners of your device, then hot glue them in place. (removing your Kindle before hot gluing , of course!)
 |
| Sorry about the annoying reflection of our ceiling fan, I was working at night! |
That's it! You're finished!!! Don't be discouraged by the 19 (yikes!) steps in this tutorial. The whole project took me less than an hour.
Now you're ready to check out your favorite blog, read a new book, or play a few games. Your Kindle is well protected and you still have the feel of holding a real book in your hands (because it is a real book cover). Choose a copy of your favorite book and your new e-reader cover is customized for you ~ plus you're saving the $30+ dollars that you would have spent on a plain boring cover from the store.


No comments:
Post a Comment