Wednesday, January 29, 2014
How much to plant
Asparagus
10-12 plants per person
Beans, Bush
10-20 plants per person
Broccoli
5-10 plants per person
Brussels Sprouts
2-8 plants per person
Cabbage
3-10 plants per person
Carrots
10-40 plants per person
Cauliflower
3-5 plants per person
Celery
3-8 plants per person
Corn
12-40 plants per person
Cucumbers
3-5 plants per person
Kale
1 5’ row per person
Lettuce
10-12 plants per person
Melons
2-6 plants per person
Onions
40-80 plants per person
Peppers
5-6 plants per person
Potatoes
10-30 plants per person
Spinach
10-20 plants per person
Sweet Potatoes
5 plants per person
Tomatoes
2-5 plants per person
- See more at: http://www.wellfedhomestead.com/how-much-should-you-plant-in-your-garden-to-provide-a-years-worth-of-food#sthash.4Q5Vftss.dpuf
Banana Pudding Cake
The only thing constant in life is change.
But that doesn’t mean it’s easy.
Growing up, changing schools, going off to college….the sad, sad end of the Friends tv series (yes, years later and I’m still mourning that loss). This weekend, it was time to visit my hometown and say goodbye to my childhood home. My parents are moving on to build their dream home. It was also my dad’s and grandpa’s birthdays. So many reasons to celebrate!!
The cake for their party combined two family favorites. Banana pudding and cake. Awesome combo!!!

But first, a funny story. There tend to be many of these when my family gets together.
This time, I was writing my last post while my mom cleaned out their pantry. Every few minutes hearing “Would you use…?” as she pawned off donated pantry items to my sister and I. Hey, I’m all for free food that will mean I don’t have to grocery shop for a while. That is, until this convo happened:
Mom: “Want some baking powder?”
Me: “Sure! When does it expire?” <– Half family joke, half necessary question
Mom: “Ummm…<searching>…1991. Omg!!”
Me: “Sure! When does it expire?” <– Half family joke, half necessary question
Mom: “Ummm…<searching>…1991. Omg!!”
Yep. That baking powder went in the trash pile.
Overall, it was a great weekend and I thoroughly enjoyed my last few nights spent visiting that house. I know it’s time to move on to bigger an better things, but that will always be our home. Did I mention change isn’t easy??
For the celebratory portion of our weekend, I worked to make a cake for both of the birthday boys. Quick break to say Hi grandpa and happy birthday!!! (He gets post updates on his iPad. Seriously, my grandparents are awesome) And happy birthday to my wonderful dad!!
So my dad likes vanilla cake with vanilla buttercream…boring…and my grandpa just likes cake. I decided to go with a banana pudding cake. Here’s the recipe:

Banana Pudding Cake
Makes ~20+ servings (we cut small pieces, so we got more than 20)
***Note: Look through each part of the cake to find all ingredients. They’re listed separately to make it easier to prepare the cake. To address comments made: Yes there are TWO boxes pudding in here (1 vanilla flavored, 1 banana flavored) and I use Cool Whip for the frosting.***
Cake
- 2 sticks butter, softened
- 1 3/4 cups sugar
- 3 eggs + 2 egg whites
- 3 tsp vanilla
- 3 cups all-purpose flour
- 3 1/2 tsp baking powder
- One 1.34oz box instant, sugar-free banana pudding mix
- 1 cup milk
Filling: Whisk together the following ingredients and refrigerate until assembling cake (~10minutes).
- One 1.34oz box instant, sugar-free vanilla pudding mix
- 1 1/4 cups skim milk
- 1 cup Cool Whip (or whipped cream)
To brush on layers: Mix together the following:
- 1 Tbsp sweetened condensed milk
- 1 Tbsp skim milk
You’ll also need:
- 2-3 medium ripe bananas
- 3-4 cups Cool Whip for frosting
Step 1: Make the cake
Preheat oven to 350 F. Prep three 8″ round pans by lining the bottom only with parchment paper. Cream butter and sugar until light and fluffy. Slowly beat in eggs and egg whites, one at a time. Beat in vanilla until well combined.
In a separate bowl, combine flour, baking powder, and pudding mix. Add into wet ingredients in three separate additions, mixing until just combined. Don’t over mix!
Stir in milk until combined. Divide batter and pour into pans. Bake 22-25 minutes or until cake is golden and begins to pull away from sides of pans.
Allow cake to cool 15 minutes in pan. Loosen and remove from pan. Allow to cool another 1-2 hours on a wire rack.
Step 2: Begin layering
Level each cake. Place first layer on cake plate. Brush with a little milk mixture.

Line banana slices on top of cake. Spread 1/3-1/2 of the filling mix on top of bananas.

Place next cake layer on top of filling. Repeat with milk mix, filling, and final layer.
Step 3: Frost
This is the fun part. Frost with Cool Whip and decorate as you wish. I crushed some mini Nilla wafers and spread on top. Then used the wafers along the sides.
Whew! Sounds super complicated, but it was simple to make. You may also want to put some Nilla wafers in between the layers. You know, if you’re feeling extra fancy and decadent.
Very important!!: Store this cake in the fridge!! Lots of perishable ingredients. You’ve been warned, so I’m off the hook if you don’t refrigerate and get sick. 

Like the fancy plates I chose?? haha :)
This may be a new family favorite. It’s definitely not a “good for you” cake, but this was a very special occasion. Everyone loved it, too! My nieces especially enjoyed picking off and eating the Nilla wafers
Thursday, January 23, 2014
how to figure out what you don't wear
Going to try this. Easiest way I can think of to downsize. Although, my time limit is 6 months or by the end of season.

T-shirt Projects
1.T-shirt yarn
http://www.instructables.com/id/t-shirt-yarn/
2.braided rug
http://sewliberated.typepad.com/sew_liberated/2011/01/the-rainbow-rug.html
3.Tote Bags
http://www.instructables.com/id/FASTEST-RECYCLED-T-SHIRT-TOTE-BAG/
4.Laptop Case
http://makezine.com/2006/08/02/make-a-tshirt-laptop-case/
5.Grow Bag
http://mimikirchner.com/blog/archives/2008/05/tomato-tutorial-making-containers/
6.Infinity Scarf
http://www.craftaholicsanonymous.net/easy-infinity-scarf-tutorial
7.Quilt
http://thesewingloftblog.com/2012/03/13/how-to-memory-quilt-part-1/
8.Headband
http://zakkalife.blogspot.com/2009/09/how-to-make-t-shirt-headband.html
9.Yoga Pants
http://leafytreetopspot.blogspot.com/2010/07/yoga-pants-from-t-shirts.html
10.Scarf
http://makezine.com/craft/t-shirt_memory_scarf/
Make Your Own Tomato Paste
http://theitaliandishblog.com/imported-20090913150324/2009/9/20/make-your-own-tomato-paste-estratto.html
Make Your Own Tomato Paste - Estratto

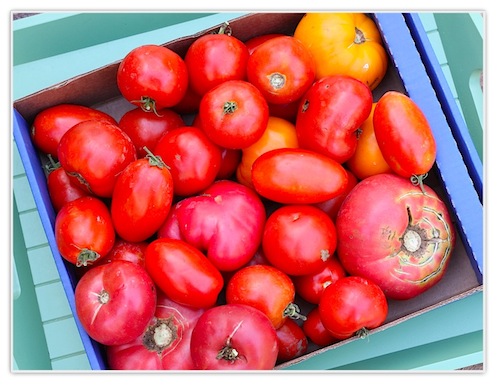
Can you stand another tomato recipe? I've been cooking a lot with tomatoes lately, but hey - everyone's got an excess of tomatoes right now. Some friends dropped off some of their tomato excess the other night to us (thanks, Brian and Diane!) and that was fine with me. What was I going to do with that many tomatoes? I was going to make my own tomato paste.
Why make your own tomato paste? Besides simply being a great way to find a use for all those tomatoes, homemade tomato paste is just such a different thing than the store bought, canned type. The flavor is so deep, so intense and concentrated, there really is no comparison. With just a little effort, you can take pounds and pounds of tomatoes and turn them into a small amount of outstanding tomato paste.
In Sicily when the tomatoes come in, they make estratto - it literally means "extracted". They take the tomatoes and extract the puree, salt it and then lay that out on a wooden table or board in the sun. The puree is turned over and over with a spatula and spread out again until eventually the sun has removed all the moisture from the puree. This can take about 2 days. You are left with a thick, dark paste that is called estratto. The estratto is then packed into jars, covered with oil and salt and placed in the refrigerator, where it can actually remain for up to a year. You can buy it but then you're still left with all those tomatoes.
Since the Michigan sun is not comparable to the sun in Sicily, I made my tomato paste in the oven, replicating what the sun does - drying out the tomato puree slowly until the moisture was gone. The result is an incredible tomato product that you won't believe. In Sicily, they add a little of this to their soups, sauces or stews. You can even spread some on a piece of bread or crostini, if you like. It's so delicious you will be tempted to eat it with a spoon.
The process is simple and not at all difficult. It just takes a long time in the oven. You will need a food mill in order to strain out the seeds and skin of the tomatoes. You can use a sieve and a spoon, but a food mill will make the process so much faster because of the quantity of tomatoes you will be working with.

Homemade Tomato Paste
for a printable recipe, click here
Ingredients:
- 6-7 pounds of tomatoes, chopped
- 1/4 cup olive oil
- 3 cloves of garlic, peeled and smashed
- 2 bay leaves
- kosher or sea salt
Instructions:
Preheat oven to 300 degrees.
Place the tomatoes, olive oil, garlic and bay leaves and two large pinches of sea salt in a large pot and cook, until tomatoes are softened, about 10 minutes. Place a food mill over a large bowl. Transfer contents of pot, in batches, to the food mill and extract the tomato puree by turning the handle of the food mill several times in one direction and then several times in the other direction. Repeat, until all the skins and seeds has been removed from all the tomatoes.
Lightly oil a baking sheet pan with olive oil. Spread out tomato puree and place in oven. Cook for about 2 hours and then turn over the puree with a spatula, spreading it out. Return to oven. Cook for another hour and turn puree over again. Cook until the puree has turned into a paste and is very thick, maybe an hour more.
Cool puree and store in a small glass jar in the refrigerator. You can top it off with a little olive oil and sea salt if you like. It will last for several months.
Homemade Ketchup

Making your own ketchup is so EASY to make at home and making it yourself allows you to control what goes into it.
Ketchup is as American as apple pie, that sweet-sour combination on french fries are irresistible and who doesn't love it on their burgers! But have you ever checked the label of your favorite brand of ketchup? High Fructose Corn Syrup is used to sweeten most brands of ketchup although I did find organic Heinz ketchup in my health food store that does not contain HFCS's, but it was half the size at a higher price.
So I thought it would be fun to try making my own and tested and played around with a few recipes until I found one that I loved with some slight changes using honey as my sweetener and cutting back on the sugar and tested it out on some grilled fries (recipe coming!) and the results were delicious...

Homemade Ketchup
Adapted from Food.com
www.skinnytaste.com
Servings: 22 • Size: 1 tablespoon • Old Points: 0 pts • Points+: 1 pts
Calories: 20.6 • Fat: 0.0 g • Protein: 0.4 g • Carb: 5.4 g • Fiber: 0.4 g • Sugar: 4.7 g
Sodium: 140.7 mg
Ingredients:
- 6 oz can tomato paste
- 1/4 cup honey (or agave)
- 1/2 cup white vinegar
- 1/4 cup water
- 1 tsp sugar
- 3/4 tsp salt
- 1/4 tsp onion powder
- 1/8 tsp garlic powder
Directions:
Combine all the ingredients in a medium saucepan over medium heat; whisk until smooth.

When it comes to a boil, reduce heat to low and simmer for 20 minutes, stirring often.
Remove from heat and cover until cool. Chill and store refrigerated in a covered container.
Monday, January 20, 2014
Rob(i)nson: Homemade Cleaning!
Rob(i)nson: Homemade Cleaning!: Don't get me wrong, I never had anything against homemade cleaners...but for some reason I always just thought I wouldn't ...
Friday, January 17, 2014

Thursday, January 16, 2014
Frugal by Choice, Cheap by Necessity: My name is Sarah, and I'm a chapstick addict
Frugal by Choice, Cheap by Necessity: My name is Sarah, and I'm a chapstick addict: I can't emphasize enough how much I need chapstick around me. Constantly. I have them stashed all around the house, and whenever I f...
Wednesday, January 15, 2014
Job 41 - Dragon?
Day 15 of reading the Bible chronologically. Sounds like a Dragon is being described in Job 41. So, that manes that Dragon's really existed. Check the highlighted areas.
41 [a]“Can you catch Leviathan[b] with a hook
or put a noose around its jaw?
2 Can you tie it with a rope through the nose
or pierce its jaw with a spike?
3 Will it beg you for mercy
or implore you for pity?
4 Will it agree to work for you,
to be your slave for life?
5 Can you make it a pet like a bird,
or give it to your little girls to play with?
6 Will merchants try to buy it
to sell it in their shops?
7 Will its hide be hurt by spears
or its head by a harpoon?
8 If you lay a hand on it,
you will certainly remember the battle that follows.
You won’t try that again!
9 [c]No, it is useless to try to capture it.
The hunter who attempts it will be knocked down.
10 And since no one dares to disturb it,
who then can stand up to me?
11 Who has given me anything that I need to pay back?
Everything under heaven is mine.
12 “I want to emphasize Leviathan’s limbs
and its enormous strength and graceful form.
13 Who can strip off its hide,
and who can penetrate its double layer of armor?[d]
14 Who could pry open its jaws?
For its teeth are terrible!
15 Its scales are like rows of shields
tightly sealed together.
16 They are so close together
that no air can get between them.
17 Each scale sticks tight to the next.
They interlock and cannot be penetrated.
18 “When it sneezes, it flashes light!
Its eyes are like the red of dawn.
19 Lightning leaps from its mouth;
flames of fire flash out.
20 Smoke streams from its nostrils
like steam from a pot heated over burning rushes.
21 Its breath would kindle coals,
for flames shoot from its mouth.
Its eyes are like the red of dawn.
19 Lightning leaps from its mouth;
flames of fire flash out.
20 Smoke streams from its nostrils
like steam from a pot heated over burning rushes.
21 Its breath would kindle coals,
for flames shoot from its mouth.
22 “The tremendous strength in Leviathan’s neck
strikes terror wherever it goes.
23 Its flesh is hard and firm
and cannot be penetrated.
24 Its heart is hard as rock,
hard as a millstone.
25 When it rises, the mighty are afraid,
gripped by terror.
26 No sword can stop it,
no spear, dart, or javelin.
27 Iron is nothing but straw to that creature,
and bronze is like rotten wood.
28 Arrows cannot make it flee.
Stones shot from a sling are like bits of grass.
29 Clubs are like a blade of grass,
and it laughs at the swish of javelins.
30 Its belly is covered with scales as sharp as glass. It plows up the ground as it drags through the mud.
31 “Leviathan makes the water boil with its commotion.
It stirs the depths like a pot of ointment.
32 The water glistens in its wake,
making the sea look white.
33 Nothing on earth is its equal,
no other creature so fearless.
34 Of all the creatures, it is the proudest.
It is the king of beasts.”
It stirs the depths like a pot of ointment.
32 The water glistens in its wake,
making the sea look white.
33 Nothing on earth is its equal,
no other creature so fearless.
34 Of all the creatures, it is the proudest.
It is the king of beasts.”
Wednesday, January 8, 2014
Natural Room Scents
http://www.theyummylife.com/Scent_Jar_Gifts_and_Centerpieces
http://bebbc5ebdc1a4edbc607-be4c9c211ff8912b25b764f460a9b626.r66.cf2.rackcdn.com/scentsrecipecard.pdf


http://bebbc5ebdc1a4edbc607-be4c9c211ff8912b25b764f460a9b626.r66.cf2.rackcdn.com/scentsrecipecard.pdf
For a bigger gift, give the jars along with a mini slow cooker. I keep my mini slow cooker filled with scented water & plugged in throughout the day to add a subtle fragrance to my kitchen. Yummy reader Donna shared that she is planning on giving a scented jar along with a mini Crock Pot to people on her holiday gift list this year. LOVE THAT! Thanks, Donna. I've been doing that, too. Here are some items I have grouped together into a gift basket:
1) scented jar (I prefer the one with oranges, cinnamon and cloves--that one has good staying power)
2) mini crock pot -- here are two compact sizes that work well:
♦16 oz. mini slow cooker --holds a single batch--compact & economical--removable insert for easy cleaning; this is the size I use for regularly simmering scented water in my kitchen and is a great size for gift giving, too. It holds one jar of scented water like the one pictured below.♦1-1/2 qt. small slow cooker --holds a double or triple batch of scented water--removable insert for easy cleaning; the larger size doesn't have to be refilled as often.
♦16 oz. mini slow cooker --holds a single batch--compact & economical--removable insert for easy cleaning; this is the size I use for regularly simmering scented water in my kitchen and is a great size for gift giving, too. It holds one jar of scented water like the one pictured below.♦1-1/2 qt. small slow cooker --holds a double or triple batch of scented water--removable insert for easy cleaning; the larger size doesn't have to be refilled as often.
3) oranges (or other citrus), a bundle of cinnamon sticks, vanilla beans, maybe some additional spices--that way they'll have what they need to make more batches
You can make scented gift jars ahead and...
- ...store in the fridge. Uncooked jars of scented waters will keep in the fridge for 1 to 2 weeks, so you can make these ahead to have on hand or for gift giving. I recommend adding all of the ingredients, including the water, to the jars before refrigerating them. I've tried refrigerating the fruit/spice/herb combos in jars without the water, but they don't last as long that way.
- ...freeze them. I've tried freezing them both with and without the water added, and both ways work fine. I haven't tested them in the freezer longer than 3 weeks, but I'm confident that they can be frozen for a month or longer. Make sure you use freezer-safe jars like these pint wide-mouth mason jars. (Not all mason jars are freezer-safe.) I like to use plastic jar lids. If you add water to the jars before freezing them, make sure you leave at least 3/4" at the top to allow for expansion when it freezes.
Below are two jars that I froze. I didn't add water to the jar on the left. I did add water to the jar on the right. After the two jars were frozen, thawed, and water was added to both, they looked identical. So, it's fine to freeze them with or without water in the jar. You choose.
Keeping the supply list simple. I only used items available at the grocery store or in my yard for these scent recipes. I want this to be easy and inexpensive so that I can set up a sustainable routine of pleasantly scenting our home. These recipes are simply guidelines and don't have to be followed exactly. In fact, I change them up all the time based on what I have on hand in my kitchen or yard.
How to Make Natural Room Scents
Fragrant items for naturally scenting your home:
- citrus -- I've tried other fruits. Some of them smell good initially, but they don't hold up for more than one use. Citrus is sturdier, longer-lasting, and gives these scent recipes freshness. Lemons and oranges are particularly fragrant and have the best staying power in these scented waters.
- herbs -- Any herb can be used for making a room scent, but the ones that are sturdier and on woody twigs hold up the best. My favorites for room scents are rosemary and thyme.
- pine or cedar twigs/needles -- There may be other fragrant trees that will work, too; pine and cedar are the two I've tried for their appealing, fresh fragrance.
- extracts -- A touch of vanilla or almond extract improves most room fragrance mixtures. Mint extract has a nice fresh scent. You can also use whole vanilla beans instead of vanilla extract; pricey but amazingly fragrant. Amazon has a good bulk price (80% less than grocery store prices).
- spices -- You can use ground or whole sweet spices. The whole spices look prettier, if your scented water will be in a location where it will be seen. I have found that cinnamon sticks and whole cloves have the most scent staying power. Cinnamon sticks can be rinsed off and reused several times. They keep on giving.
Five Natural Room Scent Recipes
These are all scents that my nose likes. But, scents that are pleasing to one person may not be to someone else. Consider how many different scents of perfumes, soap, and candles there are in stores in an effort to appeal to the masses. So, use my recipe combos as guidelines that you can tweak and customize to suit what your nose likes.
These are all scents that my nose likes. But, scents that are pleasing to one person may not be to someone else. Consider how many different scents of perfumes, soap, and candles there are in stores in an effort to appeal to the masses. So, use my recipe combos as guidelines that you can tweak and customize to suit what your nose likes.
General procedure: Combine the ingredients in a 2 cup (pint) jar or container, or in a pan on the stove top. Cover them with water and heat. I'll explain different heating options further down. Keep reading.
view on Amazon: ♦pint jars ♦plastic lids for jars
Scent #1: Oranges, cinnamon & cloves (allspice and anise are optional). This is my favorite, both for it's wonderful aroma and for it's staying power. This scent carries into multiple rooms better, and it can be reheated to scent your rooms for several days.
Scent #2: Lemon, rosemary, & vanilla. A similar scented water is often simmering in Williams-Sonoma stores. It has a lovely freshness to it. 
Scent #3: Lime, thyme, mint & vanilla extract. This combination has such a fresh, pleasant scent. I initially made it without the mint extract, but have found that it really kicks up the aroma.
Scent #4: Orange, ginger (fresh or powdered), and almond extract. This is a sweet, delicious scent. 
Scent # 5: Pine or cedar twigs (or other fragrant twigs), bay leaves, and nutmeg. These scents combine for a complex aroma. If you have whole nutmeg, use a microplane to grate off the outer surface--this will release the scent. Add the whole nutmeg piece along with the gratings.
view on Amazon: Microplane
Here's the gang of five. Aren't they beautiful? I like to make these up in pint jars and keep them on hand in the fridge so I'm ready to start a pot of simmering scents as needed. 
Make ahead and...
- ...store in the fridge. Uncooked jars of scented waters will keep in the fridge for 1 to 2 weeks, so you can make these ahead to have on hand. I recommend adding all of the ingredients, including the water, to the jars before refrigerating them. I've tried refrigerating the fruit/spice/herb combos in jars without the water, but they don't last as long that way.
- ...freeze them. I've tried freezing them both with and without the water added, and both ways work fine. I haven't tested them in the freezer longer than 2 weeks, but I'm confident that they can be frozen for a month or longer. Make sure you use freezer-safe jars like these pint wide-mouth mason jars. (Not all mason jars are freezer-safe.)
How to heat the scented mixtures
I've tried a variety of methods, and all of these work to varying degrees. Some of them provide a more powerful scent than others. Just like the air fresheners you buy, none of these will scent a whole house; but I'll show you some ways to set up individual scent sources in multiple rooms. Hopefully you already have what you need to try out one or more of these options.
Stove top method. This is by far the best way I've found to get the most powerful scent that will spread to more rooms the fastest. It's easy as can be. Simply combine the ingredients in a pot on the stove, bring them to a boil, and then lower the heat to a simmer. They will immediately begin to scent your kitchen and spread to other rooms. How far the scent spreads depends on the size and layout of your house. A simmering pot like this makes all four rooms on our first floor smell good. The only drawback of this method is that you have to keep a close eye on the water level. If the pan dries out, you'll be smelling burned citrus instead of sweet, fragrant citrus. NOTE: For a stronger scent, simply double or triple the recipe in a larger pot on the stove.
Uncovered Slow Cooker Method. This is my personal favorite. I use a mini slow cooker--the kind made for keeping dips and sauces warm. Mine only has one low heat setting. The mixture never actually bubbles and visibly steams. I leave it uncovered on my kitchen counter to slowly release scent throughout the day. It's subtle, but creates a pleasant smell in my kitchen and a hint of scent in surrounding rooms. When I'm home, I keep my mini slow cooker going. It's easy and uses very little electricity. When I fill mine in the morning, it won't dry out for an entire day. If you're concerned about accidentally letting it run dry, you can put a lamp timer on it so that it automatically shuts off at the desired time. I put a scented jar mixture in the microwave for 2 minutes to get it really hot before I add it to the slow cooker. That gives it a jump start on releasing the scent. NOTE: For a stronger scent, simply double or triple the recipe in a larger, full-size slow cooker and set it on high.
view on Amazon:♦16 oz. mini slow cooker --holds a single batch--compact & economical--removable insert for easy cleaning; this is the size I use for regularly simmering scented water in my kitchen and is a great size for gift giving, too.
♦1-1/2 qt. small slow cooker --holds double or triple batch--removable insert for easy cleaning; the larger size doesn't have to be refilled as often.
♦on-off lamp timer --for auto shut-off
♦1-1/2 qt. small slow cooker --holds double or triple batch--removable insert for easy cleaning; the larger size doesn't have to be refilled as often.
♦on-off lamp timer --for auto shut-off
Fondue Pot Method. If you have a fondue pot, then you have a portable scent station. Set it up in any room you'd like to scent. Below is a small ceramic fondue pot I have that uses a tea light for heat. So, this will only remain warm as long as the candle lasts--3-1/2 to 4 hours. Like the slow cooker, this is a low level of heat and releases a very subtle scent--enough for a small room. Get the scent mixture boiling hot before adding it to the fondue pot. I like to set this up in our entry way when we have guests. It makes it smell wonderful when you walk through our front door. And, it looks pretty.
view on Amazon: small ceramic fondue pot
Mug Warmer Method. I normally keep this little mug warmer next to my computer to keep my coffee and tea warm. I've discovered it also can be used to keep a jar or small bowl of scent mixture warm. It only keeps it warm, it doesn't actually heat it up. So again, be sure to heat the mixture before adding it the bowl. Or microwave a jar and set it right on top of the mug warmer. This low heat puts off a soft, subtle scent that is suitable for a small area like a bathroom.
- Here's a hint to keep it pretty. As the mixtures cook and lose their color, they're not as attractive. You can spruce it up by floating a fresh slice of citrus on top. Or add a few cranberries (I keep a bag of them in my freezer); they float and add a touch of color.
view on Amazon: electric mug warmer
Candle Warmer Method. These work just like the mug warmers. Candle warmers come with a little bowl on top for melting scented candle pellets. Instead, you can add some heated scented water. Or, remove the bowl and set a jar or other bowl on top.
- Note: I tested the temperatures of these with a thermometer. The mug warmer and candle warmer both kept the mixture at about 120°F. That's enough to let off a very subtle scent in a small area or room, but don't expect these to strongly scent a big room. You need more heat and steam for a stronger scent.
view on Amazon: ceramic electric candle warmer
Tea Pot Warmer Method. My tea pot warmer also uses tea lights. I can put two or three tea lights in mine to achieve the temperature I want. These only last as long as the tea lights burn, but they can get hotter than the mug and candle warmers, thus releasing more scent. I can put a bowl or jar on top of my tea pot warmer, as long as I put it somewhere that I can keep an eye on it. I don't like to leave candles unattended.
view on Amazon: cast iron teapot warmer
Add more hot water as needed. As the water evaporates from any of these warming bowls or jars, top it off with additional HOT water. It needs to be hot when it's added so that it doesn't cool down the temperature of the scented water. Higher heat = more fragrance.
Gift them! These make a fun, unique hostess gift. Take one along to a party as a gift for your host that can be simmered and enjoyed the next day.
Reuse each mixture 2-3 times. After these have been heated and simmered for awhile, the water becomes cloudy (as you can see in the jars below), and some of the ingredients lose their vibrant color. Although they don't look as pretty, they still smell good. Usually, you can reheat and simmer these again 2-3 times. Jar them up and refrigerate them between uses. Open the jar and give it the sniff test--if it still smells good, reheat and reuse it. Add more water as needed.
Cost saving tips
You can save, use and reuse a number of fragrant ingredients. These scents don't need to be expensive.
- Leftover ginger -- If you ever cook with fresh ginger and end up with leftover pieces , this is a way to use them up before they spoil. Slice the leftover ginger and freeze it in a bag or container to have on hand for whipping up a quick batch of scented water.
- Save your orange peels -- When you eat an orange, save the peel for use in scented waters. Store them in the refrigerator or freezer until you need them.
- Save your juiced lemons and limes -- After you've juiced these for use in a recipe, refrigerate or freeze the leftover pieces.
- Save your leftover herbs -- If you have herbs in a garden or have leftover herbs that you've purchased for cooking, they can be frozen and saved for use in these scented waters.
- Use expired juices. If you have fruit juices that are past their prime, use them as a base in place of the water in these mixtures. They're both fragrant and colorful.
- Use expired spices. Spices are supposed to be replaced after a year, because they lose much of their flavor. But, they still smell good! Instead of throwing out old spices, use them for scenting water.
There are endless combinations for these scented waters. If you have some additional ideas, please share. I'm always looking for a new, pleasant scent for my home.
Oh, and good news . . . King-Man likes these natural scents. Happy husband, happy home.
Make it Yummy day!
Monica
Monica
Read my follow-up post to this one
NATURAL ROOM SCENTS FOR DIY GIFTS & CENTERPIECES
NATURAL ROOM SCENTS FOR DIY GIFTS & CENTERPIECES
You might also like these:


Natural Room Scents
By Monica
Ingredients
- Citrus, sliced -- lemons, oranges, limes (may use peel only, if preferred)
- Herbs -- rosemary, thyme, & bay leaves
- Spices-- whole cinnamon, cloves, nutmeg, allspice (optional), anise (optional); may substitute ground/powdered spices
- Ginger (fresh or powdered)
- Extracts--vanilla, almond, mint
- Pine twigs (or other fragrant twigs)
Directions
Use a pint (2 cup) jar, container, or pot to combine scent waters. Add ingredients to container, cover with water, and choose from these options:
--simmer on stove top, topping off with more water as it evaporates
--add heated mixture to a slow cooker, fondue pot, or something similar that will keep mixture heated. Preheat waters to a boil (in microwave or on stove top). As water evaporates, always top it off with HOT water to keep the temperature as high as possible. Higher heat = more fragrance.
FRAGRANT COMBINATIONS:
1. Orange, Cinnamon & Spice. 1 orange, 2 cinnamon sticks (or 2 teaspoons ground cinnamon), 1/2 tablespoon whole cloves (or 1/8 teaspoon ground cloves), 1/2 tablespoon whole allspice (or 1/4 teaspoon ground allspice), 1 anise star (optional)
2. Lemon, Rosemary & Vanilla. 3 sprigs of fresh rosemary, 2 lemons, 1 teaspoon vanilla extract.
3. Lime, Thyme, Mint & Vanilla. 3 limes, 3-4 sprigs fresh thyme, 1/2 teaspoon mint extract, 1 teaspoon vanilla.
4. Orange, Ginger, & Almond. 1 orange (or peel from 2 oranges), 1 4" finger of ginger, sliced (or 1 tsp ground ginger), 1/2 teaspoon almond extract.
5. Pine, Bay Leaves, & Nutmeg. Handful of pine twigs or needles, 4 bay leaves, 1 whole nutmeg, outer layer grated into mixture.
Scented waters may be refrigerated between uses. Reuse for 2-3 days, or as long as they still have a pleasant fragrance.
Subscribe to:
Posts (Atom)
-
smallest effort/biggest taste payoff recipe evar behold, an oven pan laden with delicious food (a LOT of it) that is cost-effective, E...
-
 Ever since I started using Hydrogen Peroxide to get rid of armpit stains, to clean cookie sheets, as a miracle cleaner in my k...
