How To Build An Indoor Seed-Starting Rack – Cheap!
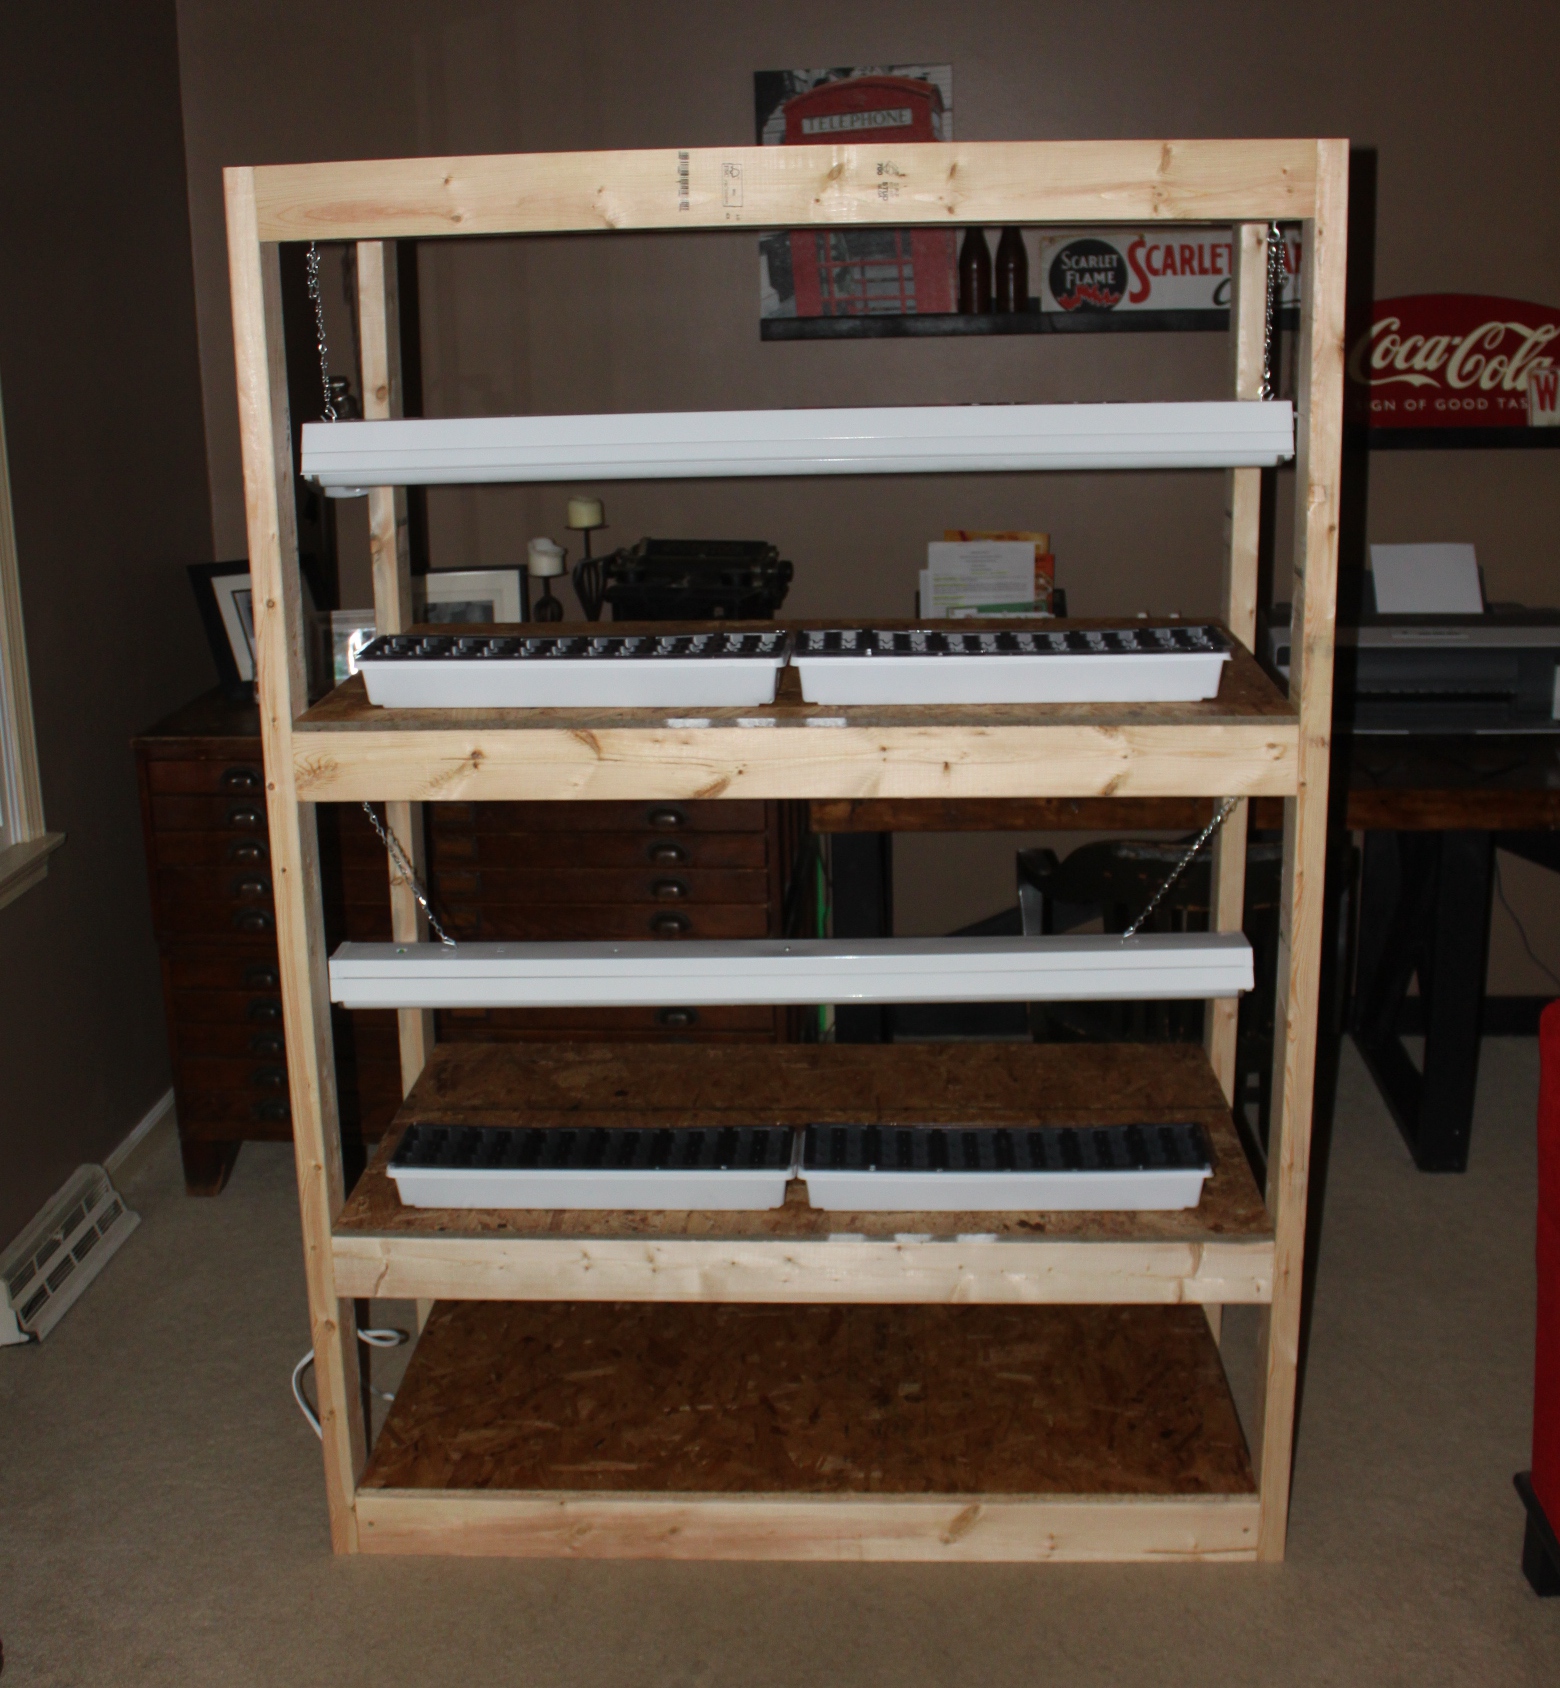
Our seed-starting rack stand – with room for almost 600 seedlings!
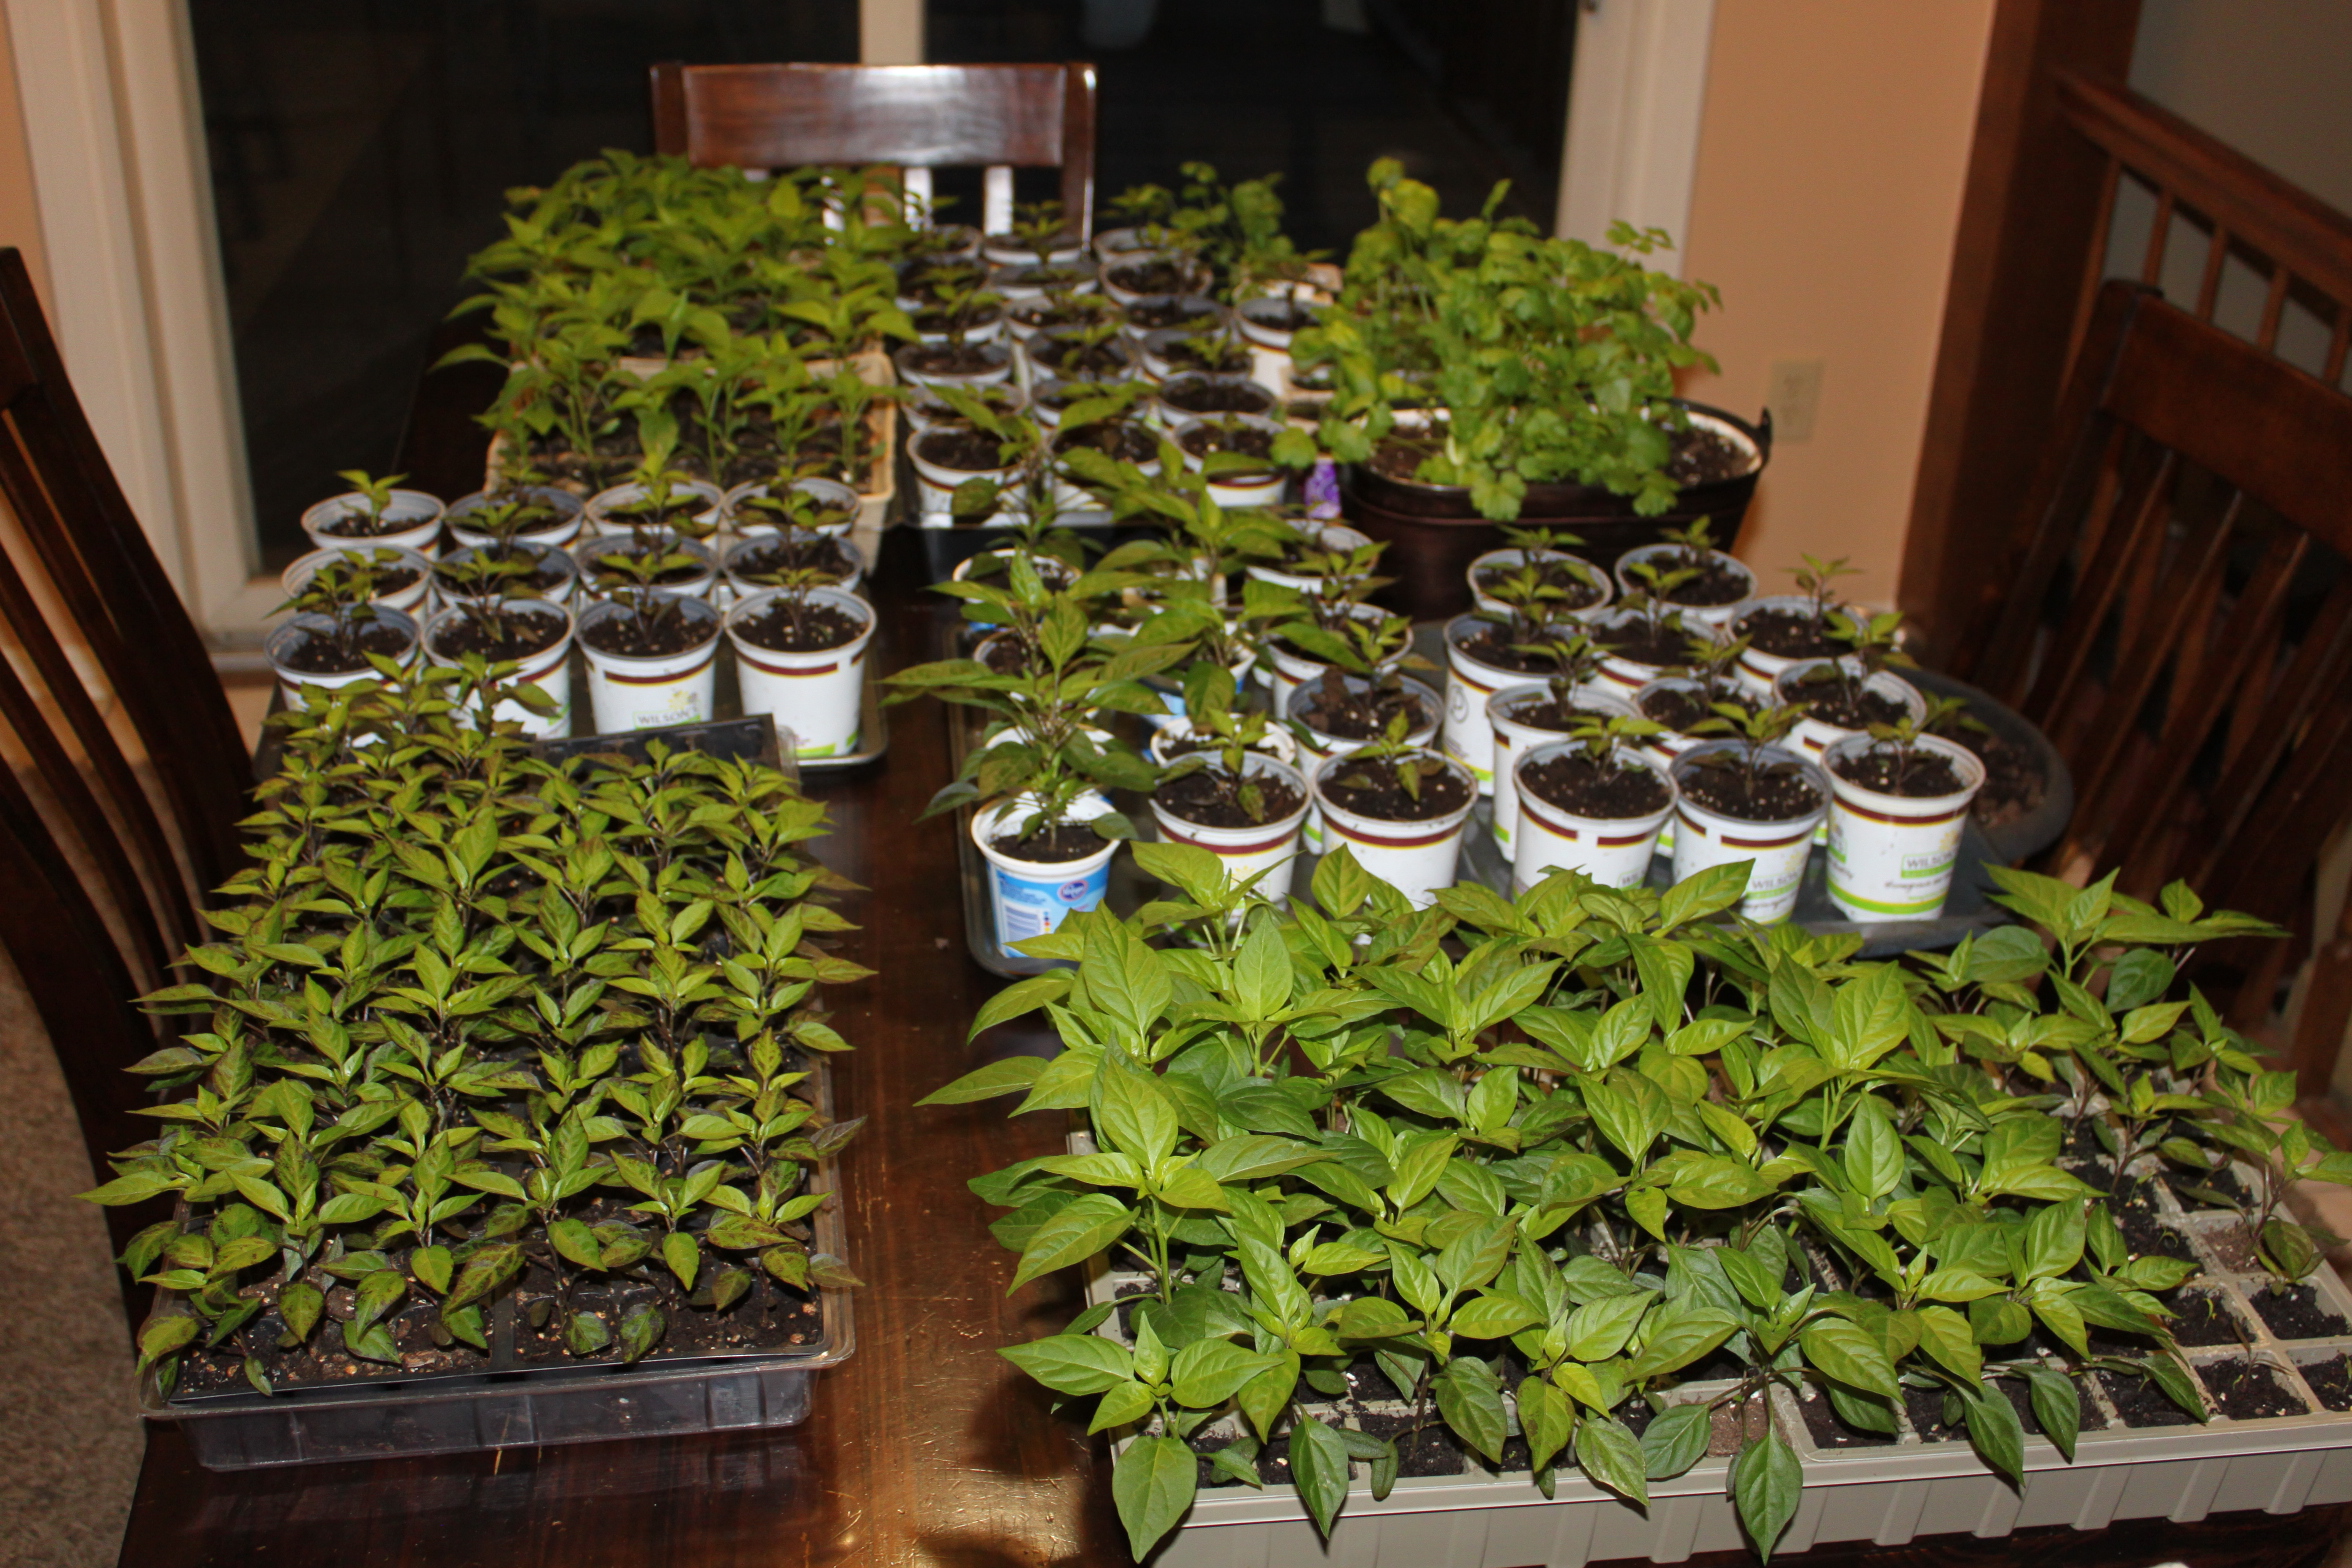
Our dining room table / mini garden area last spring.
For the last few years, in the late winter months, our dining room table transforms into our seed starting area – or as we like to call it – our mini garden. We actually had it down to a science, using a few inexpensive shop lights to grow our plants healthy and strong. The mini garden set-up unfortunately also rendered the dining area useless for the 6 to 8 weeks it took to germinate and grow all of the ornamental pepper and garden plants we use. Not to mention, some strange looks from company wondering what we were “growing” in there under the dim glow of flourescent lights  .
.
So, for this week’s DIY segment – we thought we would design and build our very own lighted seed-starting rack. The rack will allow us to move the entire seed starting operation out of the dining room – and into an unused portion of our basement. It also allows us to double the seeds and plants we can start indoors in less space – from the 4 flats we could start on the table, to a full 8 flats.
We wanted it to be simple, strong, and of course, as always – cheap!
Using just nine simple 2 x 4 x 8 pieces of lumber, a single sheet of particle board and 4 inexpensive double-bulb shop lights – this can be made from scratch for around $50 to $70. Even less if you happen to have some old shop lights or scrap lumber laying around! It will accommodate up to 8 full size seed trays on the two growing shelves – and can grow up to 576 plants if using the 72 pack cell inserts. There is even shelf space at the bottom to store gardening supplies – or if you are really ambitious – another layer of plants! The best part of the project – it can be assembled with simple tools in less than an hour or two. In our case – we cut, built and assembled it in the time it took to watch the Houston Texans take our Cincinnati Bengals out of the playoffs! It’s also strong and can double as a great storage shelf when not in use the rest of the year.
Here is how we built it:
Once you have your 3 rectangles assembled – screw in the four 6′ vertical boards to the bottom shelf first
Materials List:
(9) ea. 2 x4 x8′s
(4) ea. Hanging Shop Lights
(1) 4′ x 8′ sheet of 1/2 strand board or plywood
(50) 3″ screws
(8 to 12) 2″ screw hooks
(4) ea. Hanging Shop Lights
(1) 4′ x 8′ sheet of 1/2 strand board or plywood
(50) 3″ screws
(8 to 12) 2″ screw hooks
Tools Needed:
Circular or Chop Saw
Screw Gun
Tape Meassure
Screw Gun
Tape Meassure
How We Built It:
(We have included extra photos at the bottom to help show the building process)
Start by cutting all of your pieces:
You will need to cut the 2×4′s into the following sizes:
4) ea. 6′ long
8) ea. 4′ long
8) ea. 2′ long
4) ea. 6′ long
8) ea. 4′ long
8) ea. 2′ long
Taking the 4′ x 8′ sheet of plywood or strand board, cut three pieces, each 27″ x 4′ wide – these will become the shelves of the stand.
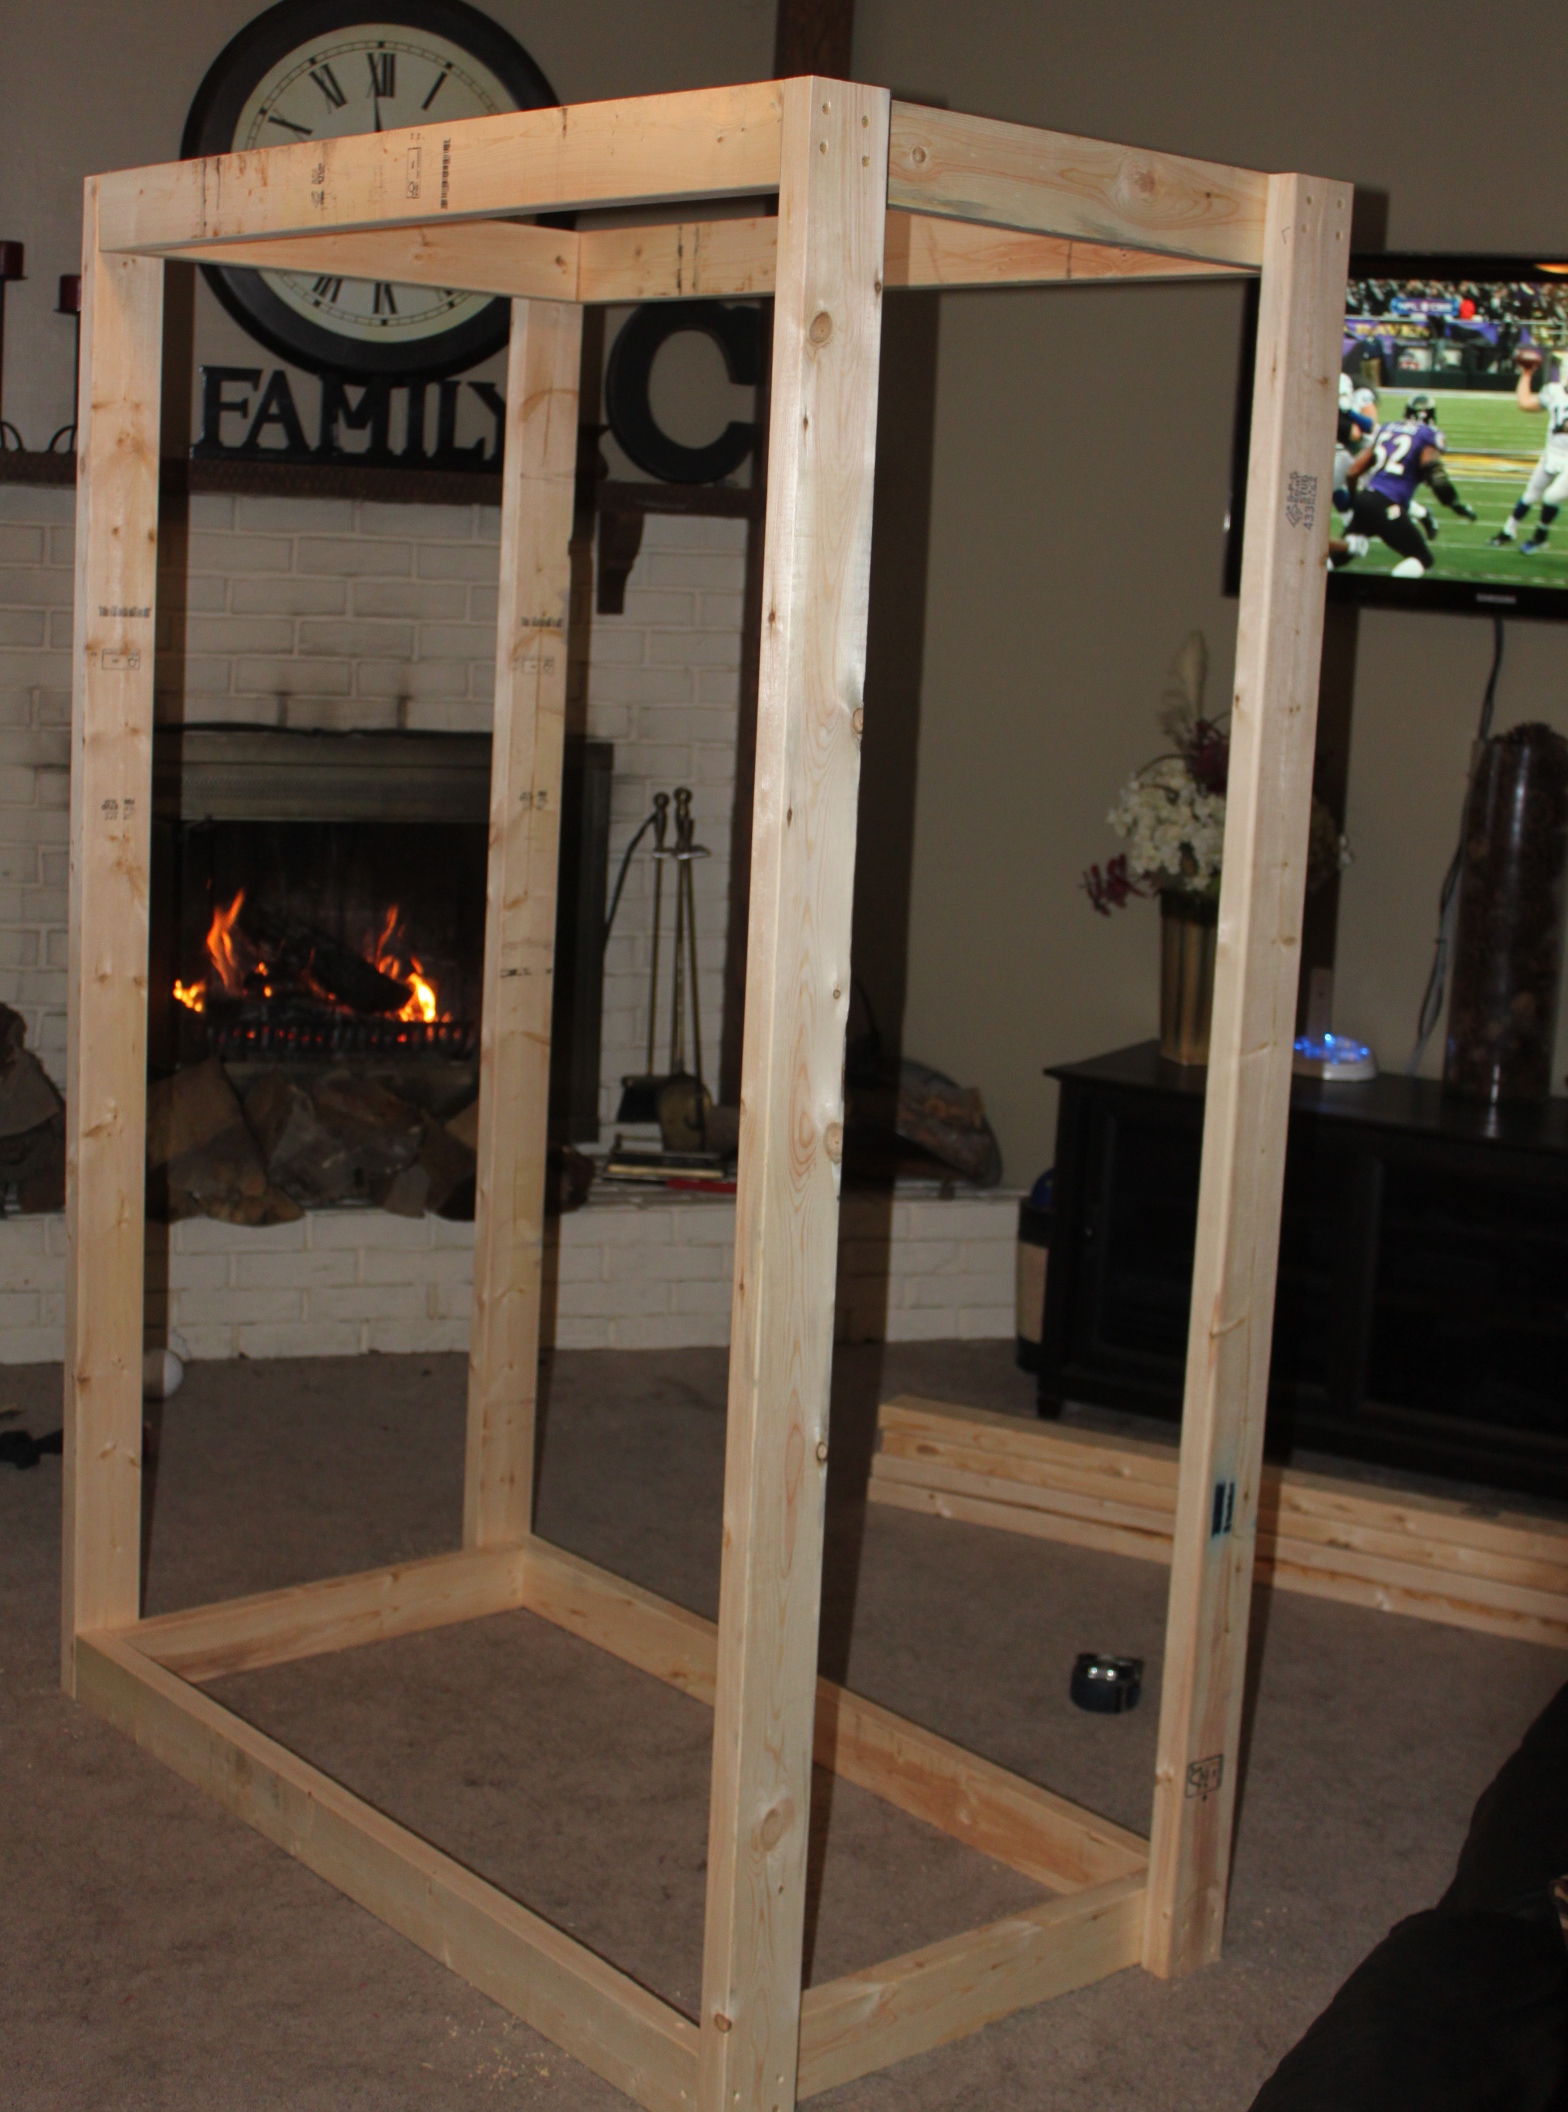
Next – attach the second rectangle wood square to the top of the 4 6′ support legs
The actual building process is a snap – especially if you have two people for an extra set of hands. We normally use construction adhesive when we build anything for extra durability – but we forewent that on this project in case we ever want to disassemble and relocate the shelves.
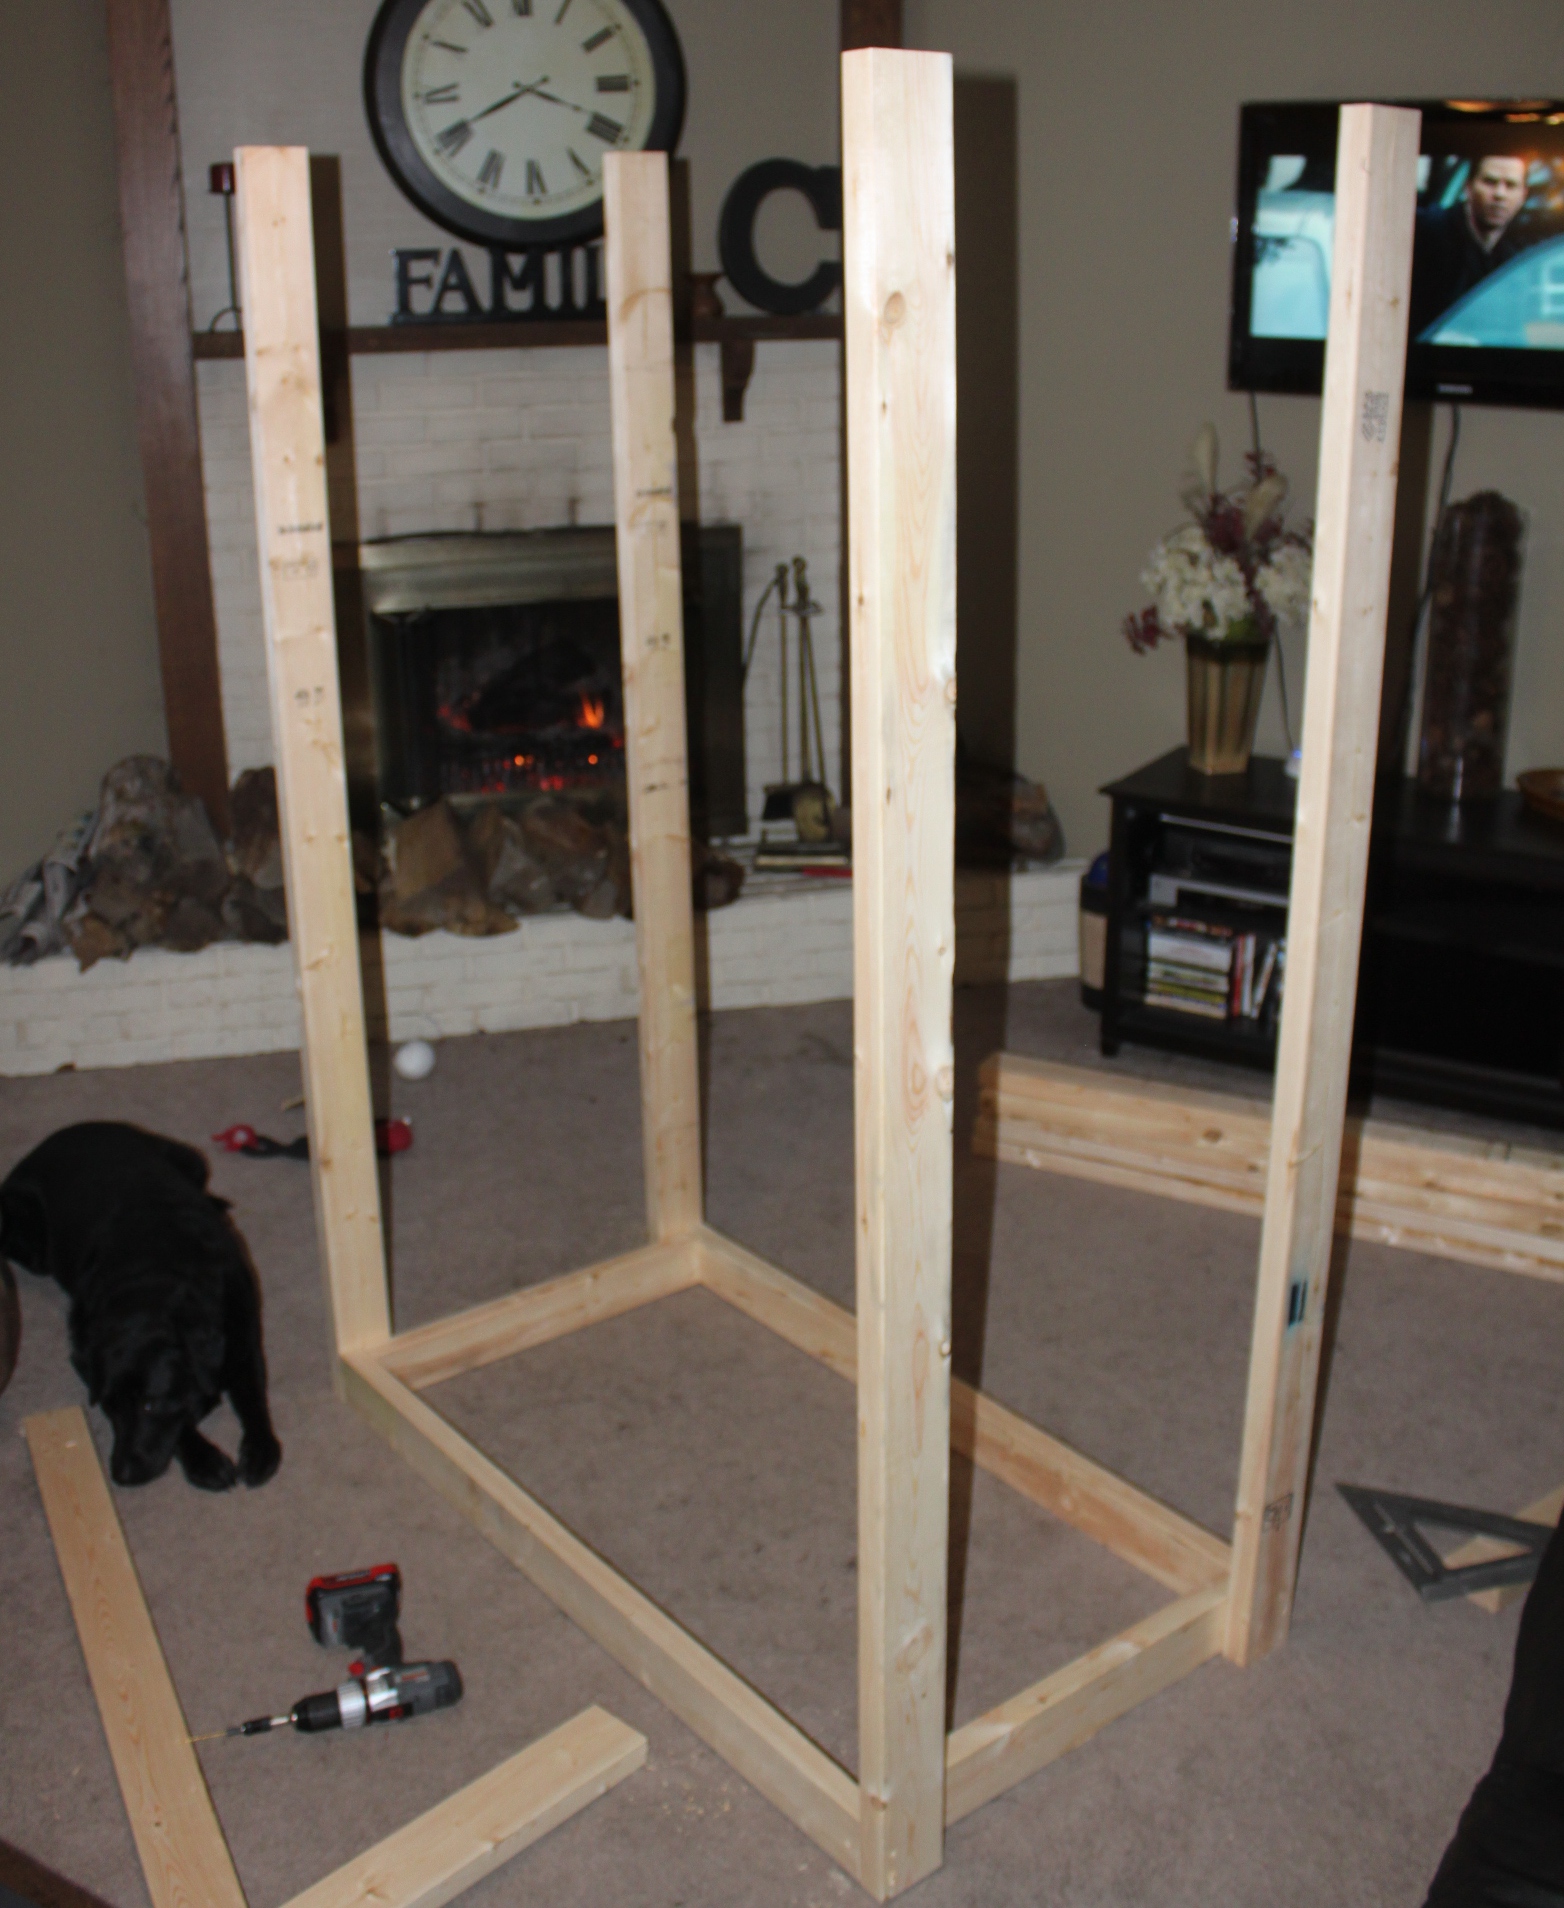
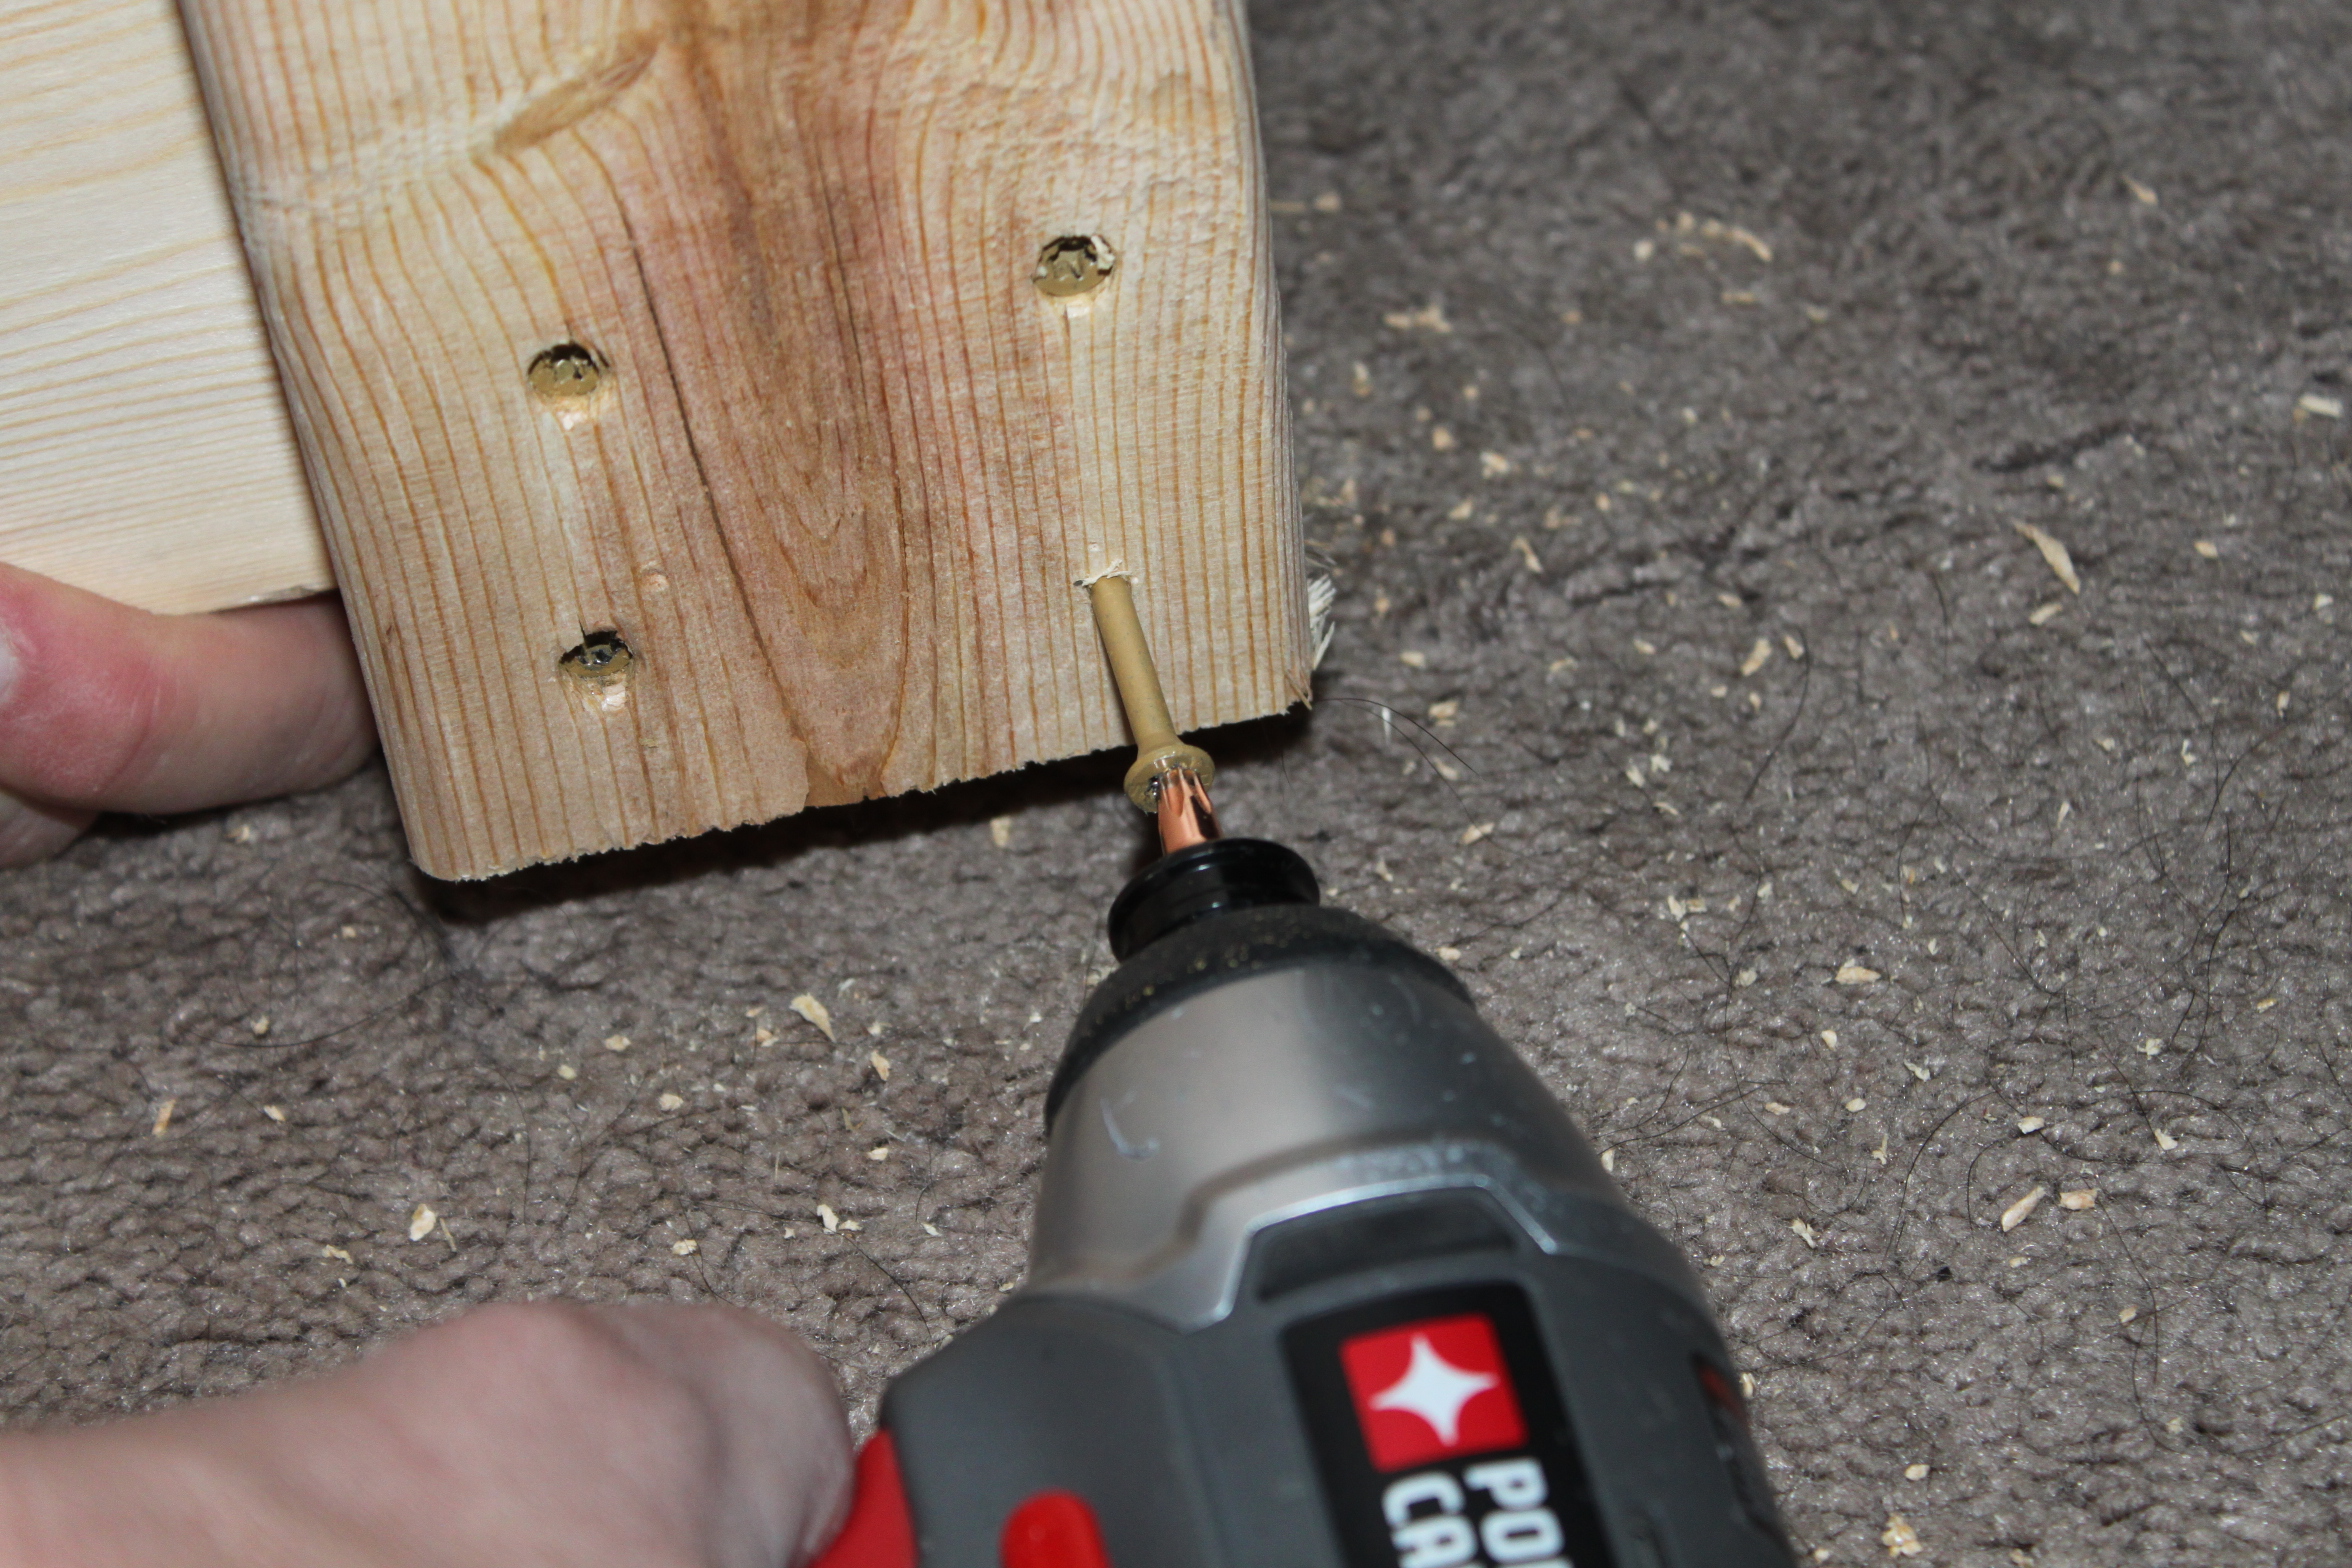
Start by building your 4 rectangular shelf supports from the 4′ and 2′ pieces. Create a rectangle by placing two 2′ boards flush at the ends of two 4′ boards. Drive a single screw in the middle of each connection to create a solid rectangle. Repeat until you have all four rectangles assembled.
Next, we will assemble the bottom shelf first. Take one of your 6 foot boards and place it flush on the end of the outside edge of where the 2′ and 4′ pieces meet. (see pictures) Then – making sure your 6′ board is straight in the air at a 90 degree angle – we screw it in place with a total of 4 screws. We put 2 screws that sink into the 2′ board and 2 more than sink into the 4′ board. Repeat for the other 3 “legs” and you are on your way to your plant stand.
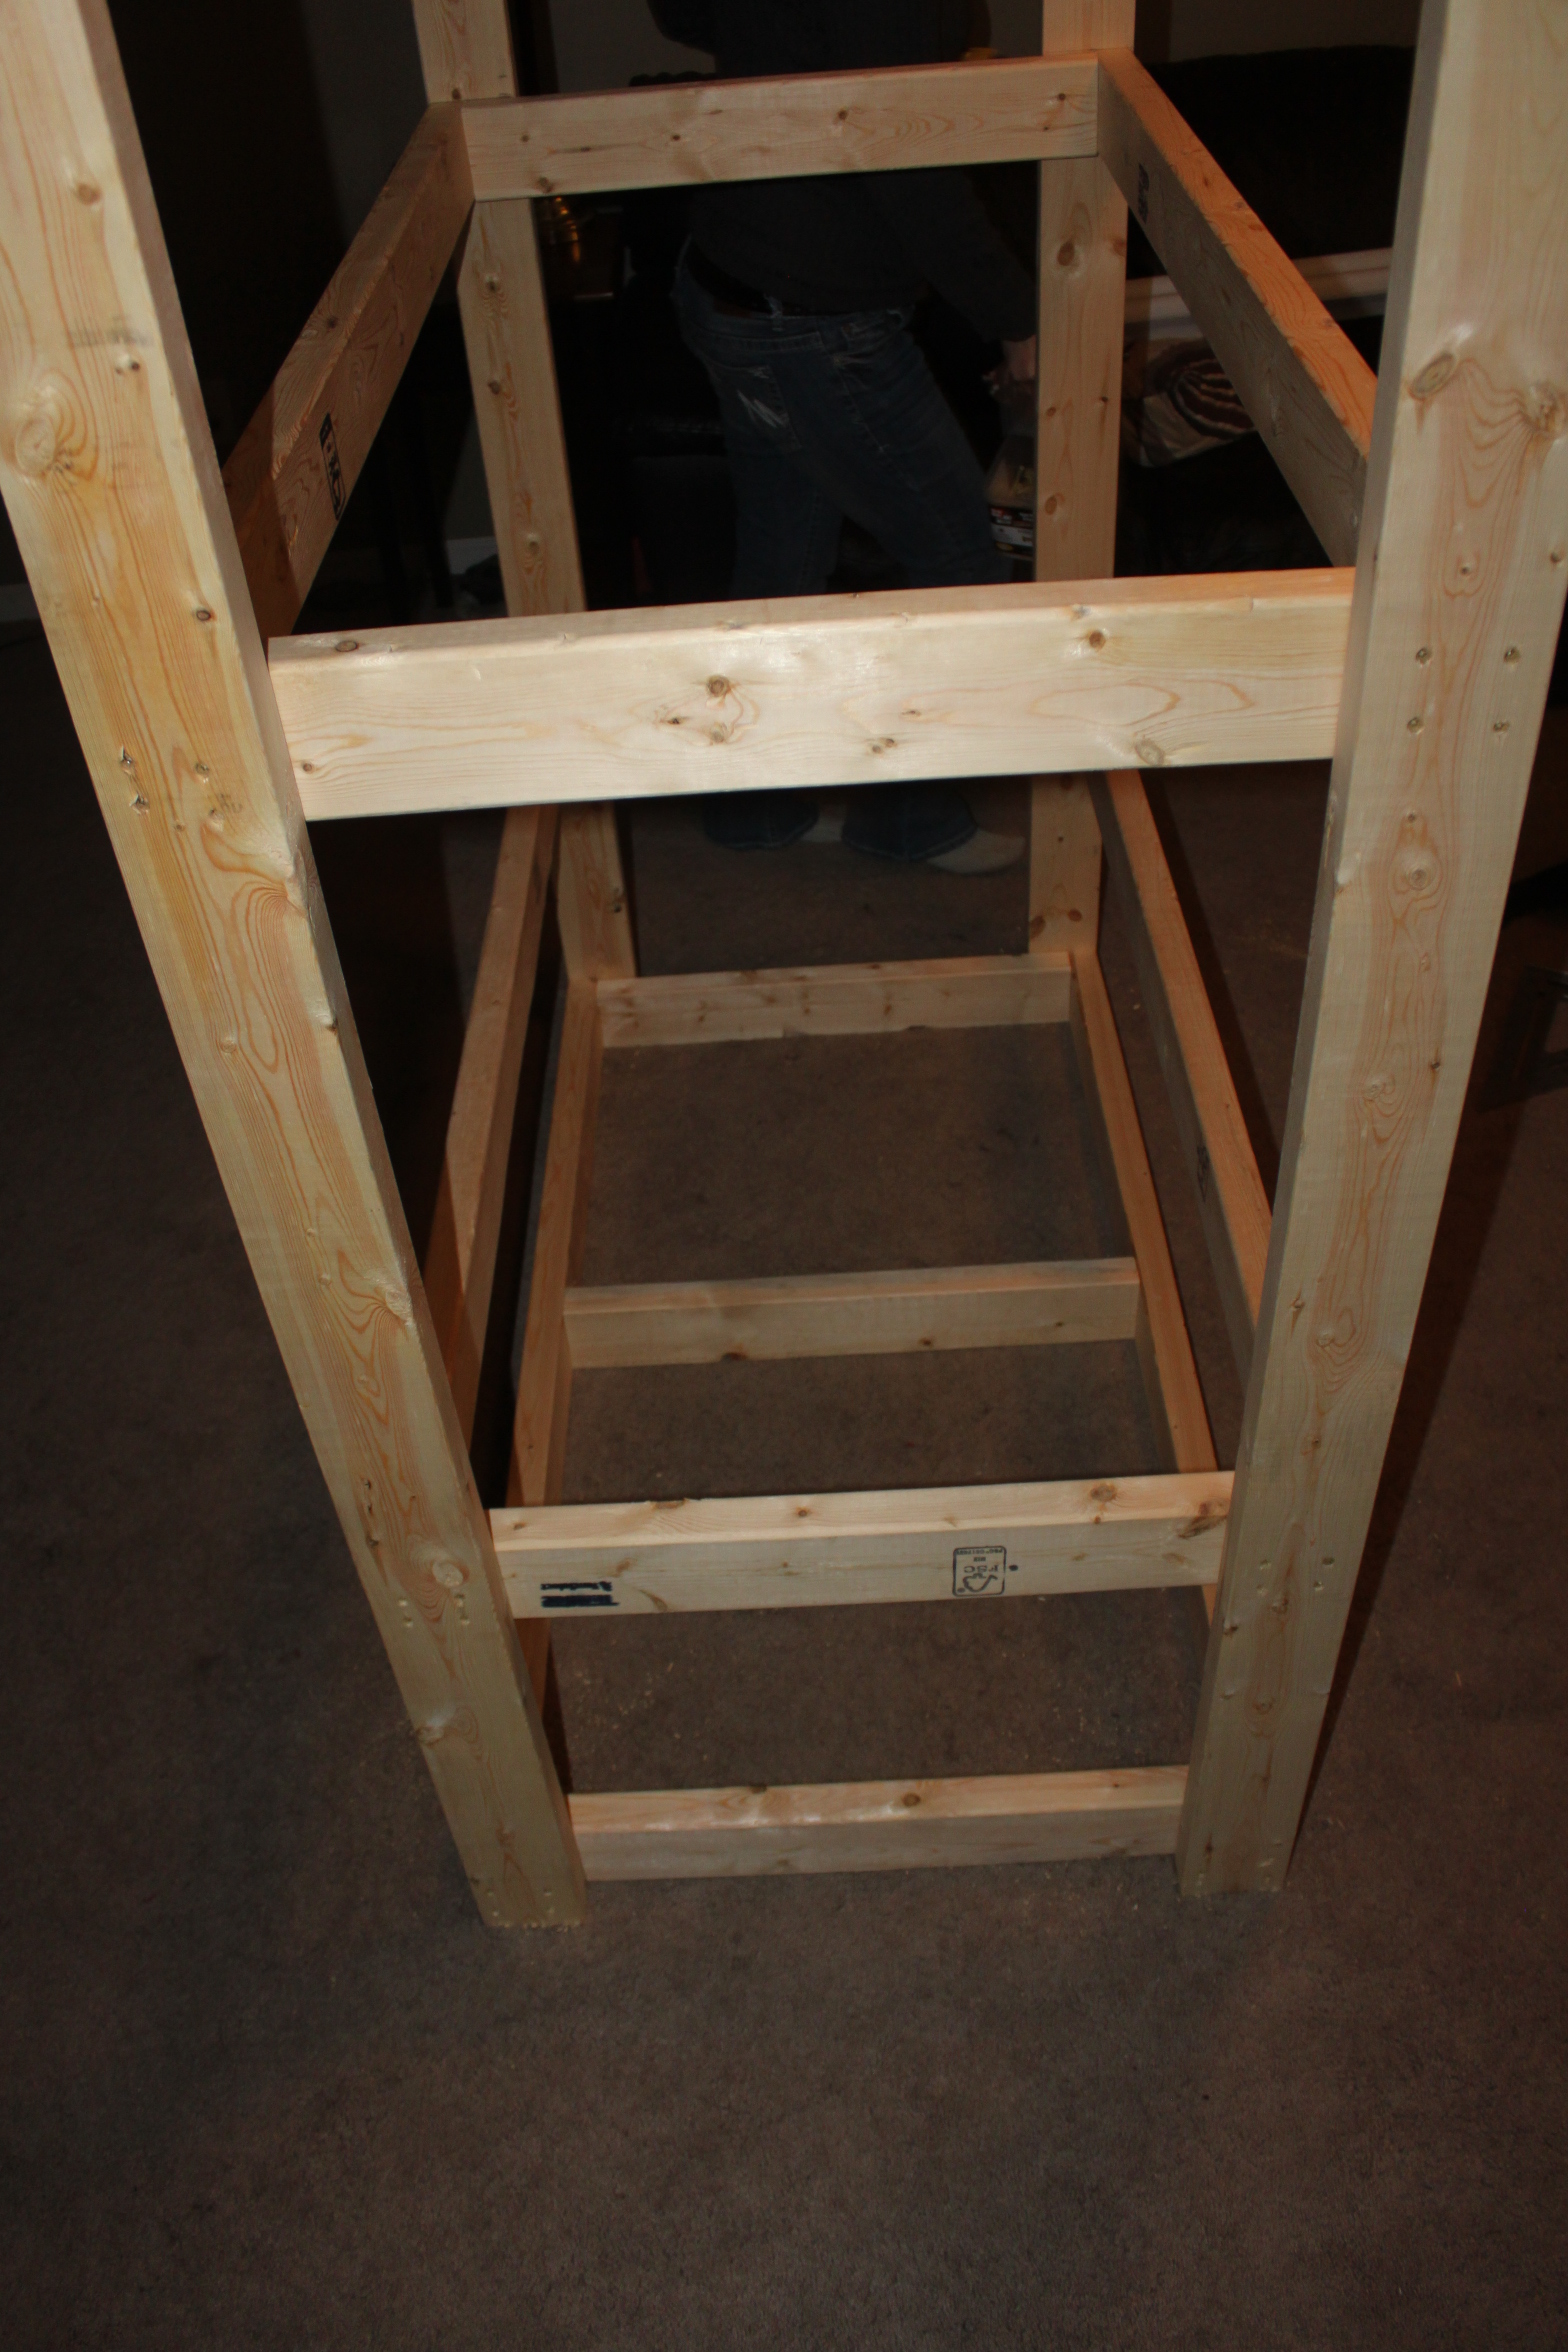
Next – we screw in one more of the rectangles the same way – this one at the top – flush with the top of the 6′ boards. Once you have this screwed in – your stand will start to become very stable.
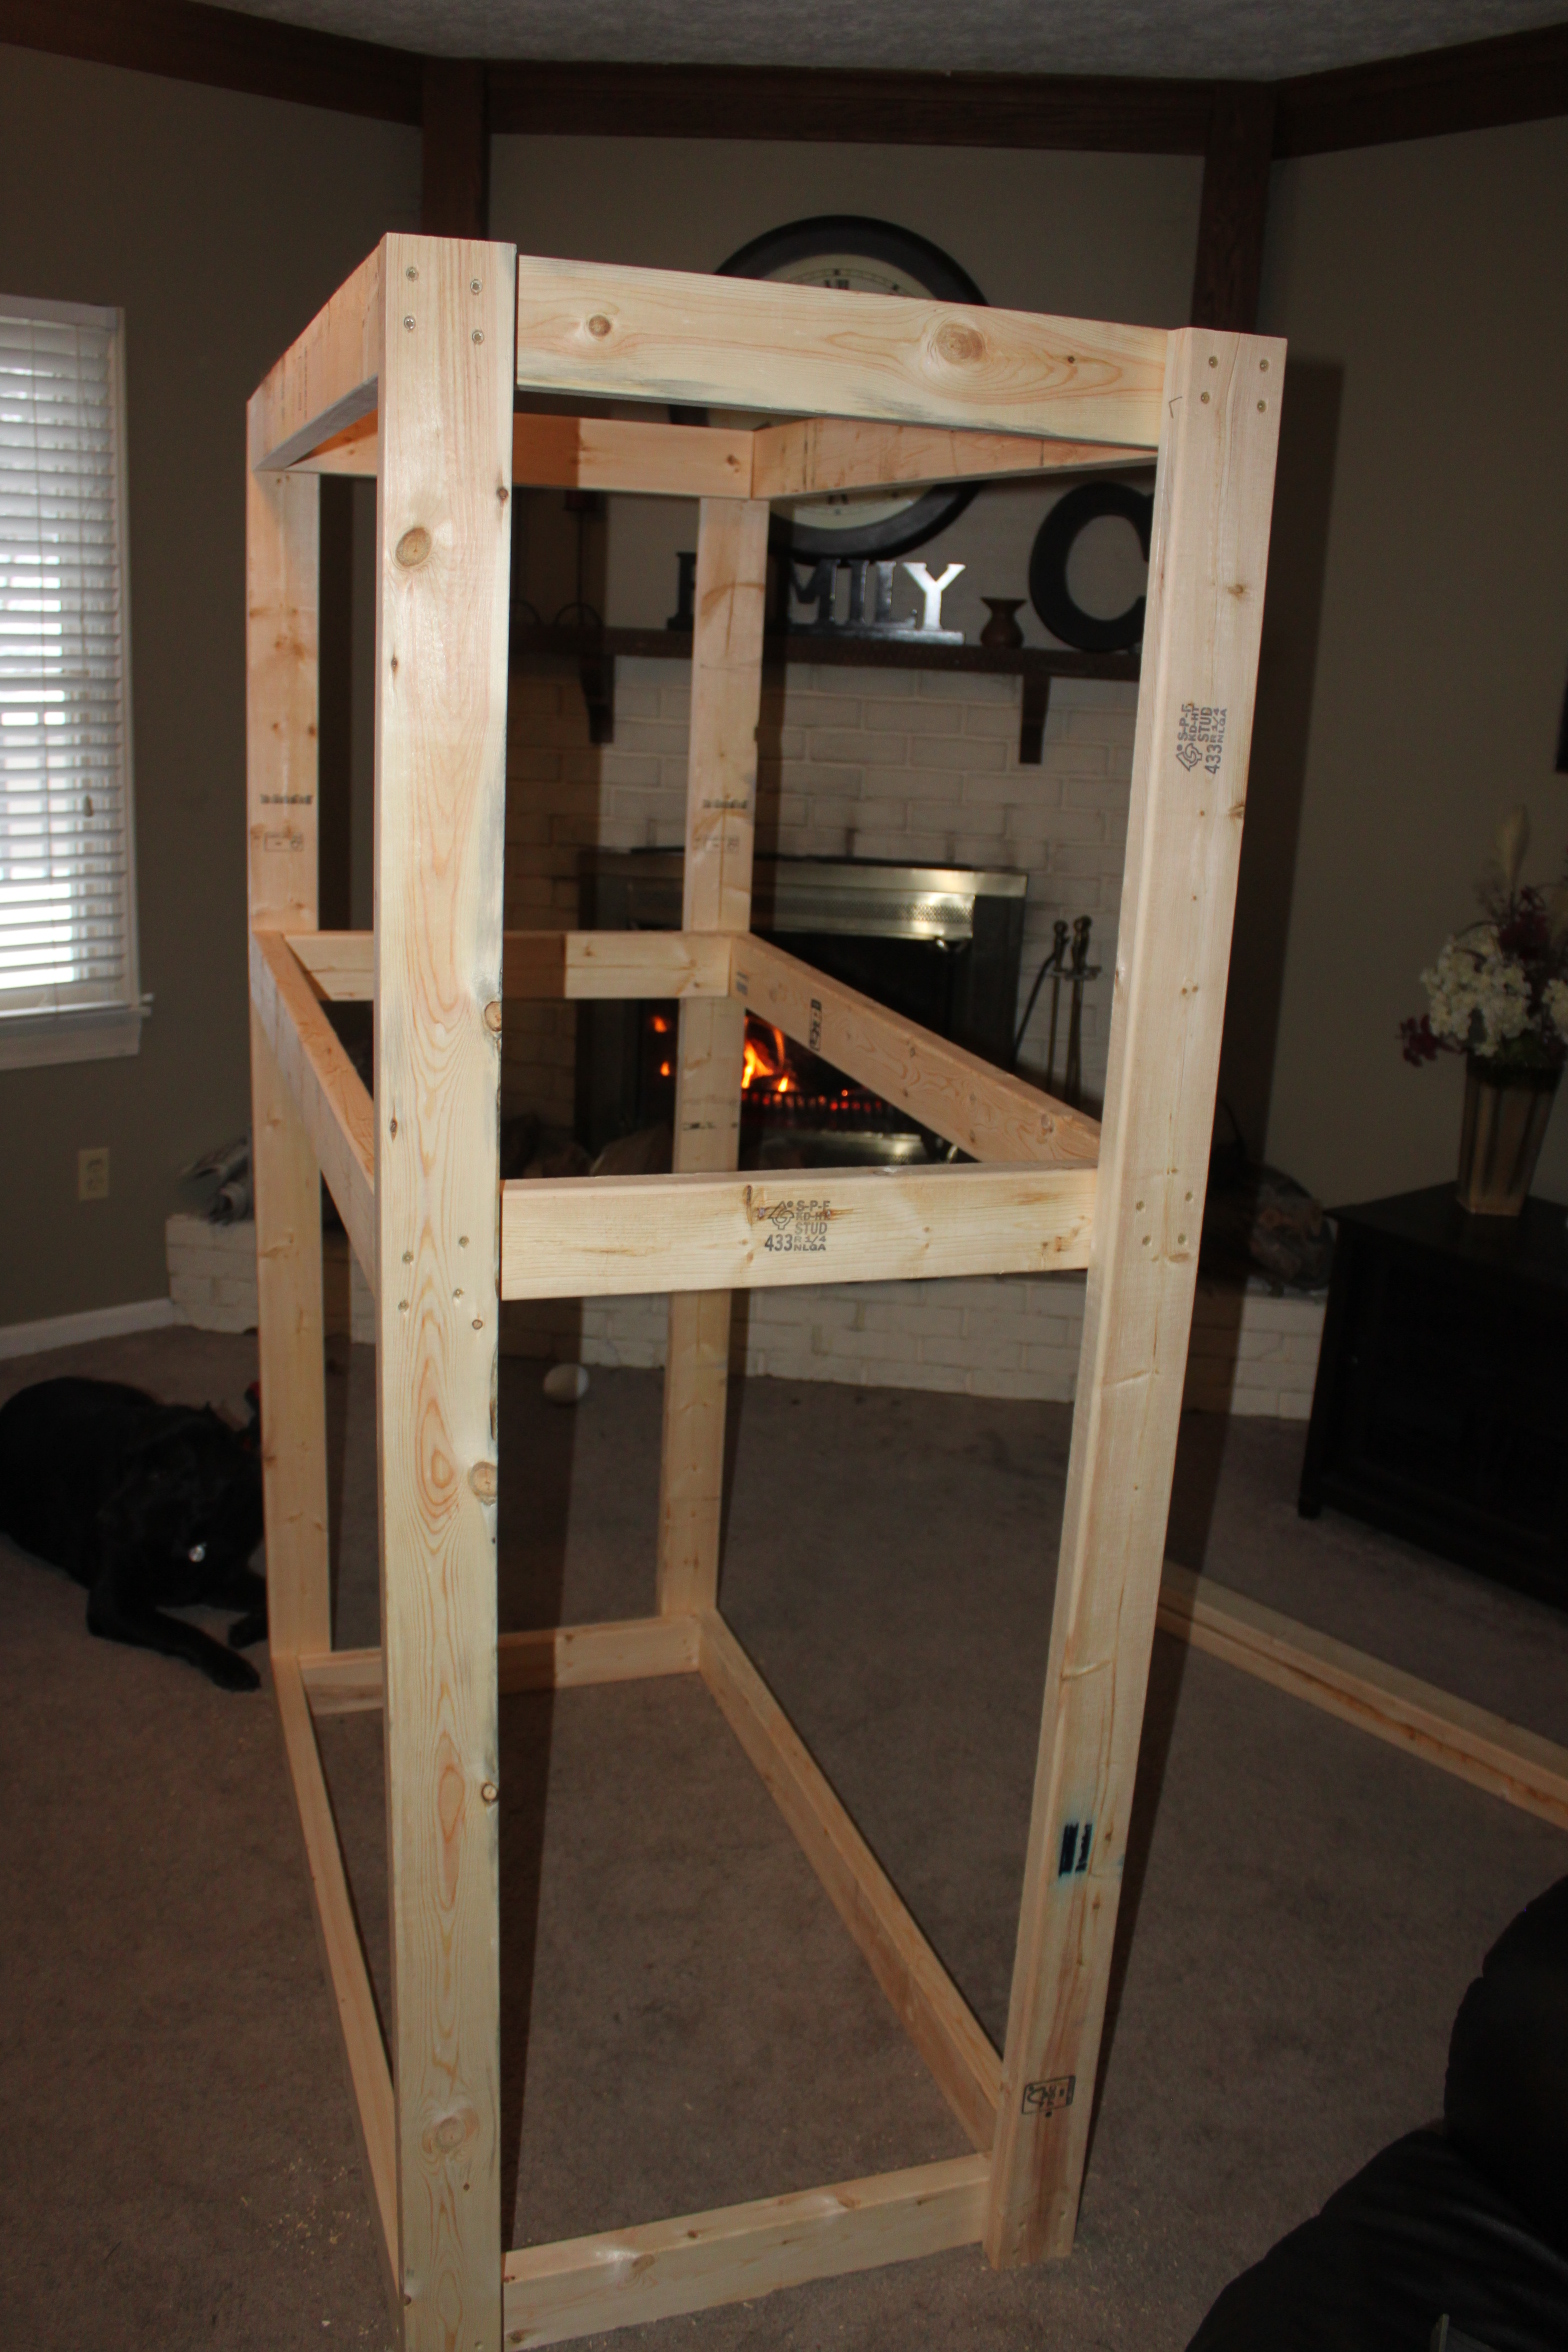
Attach the final two shelf rectangles for your two shelves.
Now, we just simply repeat with the final two rectangles, screwing them in to form the bases for the growing shelves. For our set-up, we set our two shelves at 23″ apart – this allows us plenty of room to adjust the lights up and down with chains as the plants grow, and lets our plants have plenty of room to grow big. As another option you could also evenly space the two middle shelves and actually grow on the bottom shelf as well for 3 growing areas. For us, two is more than plenty – and we will just use the bottom shelf as for storage items.
Next, slide in the 3 27″ x 4′ shelf boards you have cut from the plywood or strand board to make your shelves. Simply drive a few screws into the support frame to secure.
Once you have all of your shelves in, its time to hang your lights. Simple screw hooks work great here. A small pre-drilled hole will help you screw them in. We install 2 hooks on each side – spaced evenly on the 2 foot end bars. Most of the inexpensive shoplights at the big box stores will come with a small chain and S hook for the light – just install and your set. To make ours even easier to operate – we are going to install a small power strip on the side, allowing the lights to be turned on with a single flip of the switch.
There you have it – an inexpensive seed-starting stand! If you want more information of starting seeds – you can see our article from a few weeks back – How To Easily Start Seeds Indoors
If you would like to receive our weekly DIY and Gardening Posts – be sure to sign up to follow our blog via email, Twitter or Facebook in the right column.
- Jim and Mary
Shared on Savvy Southern Style, Gnowfglins
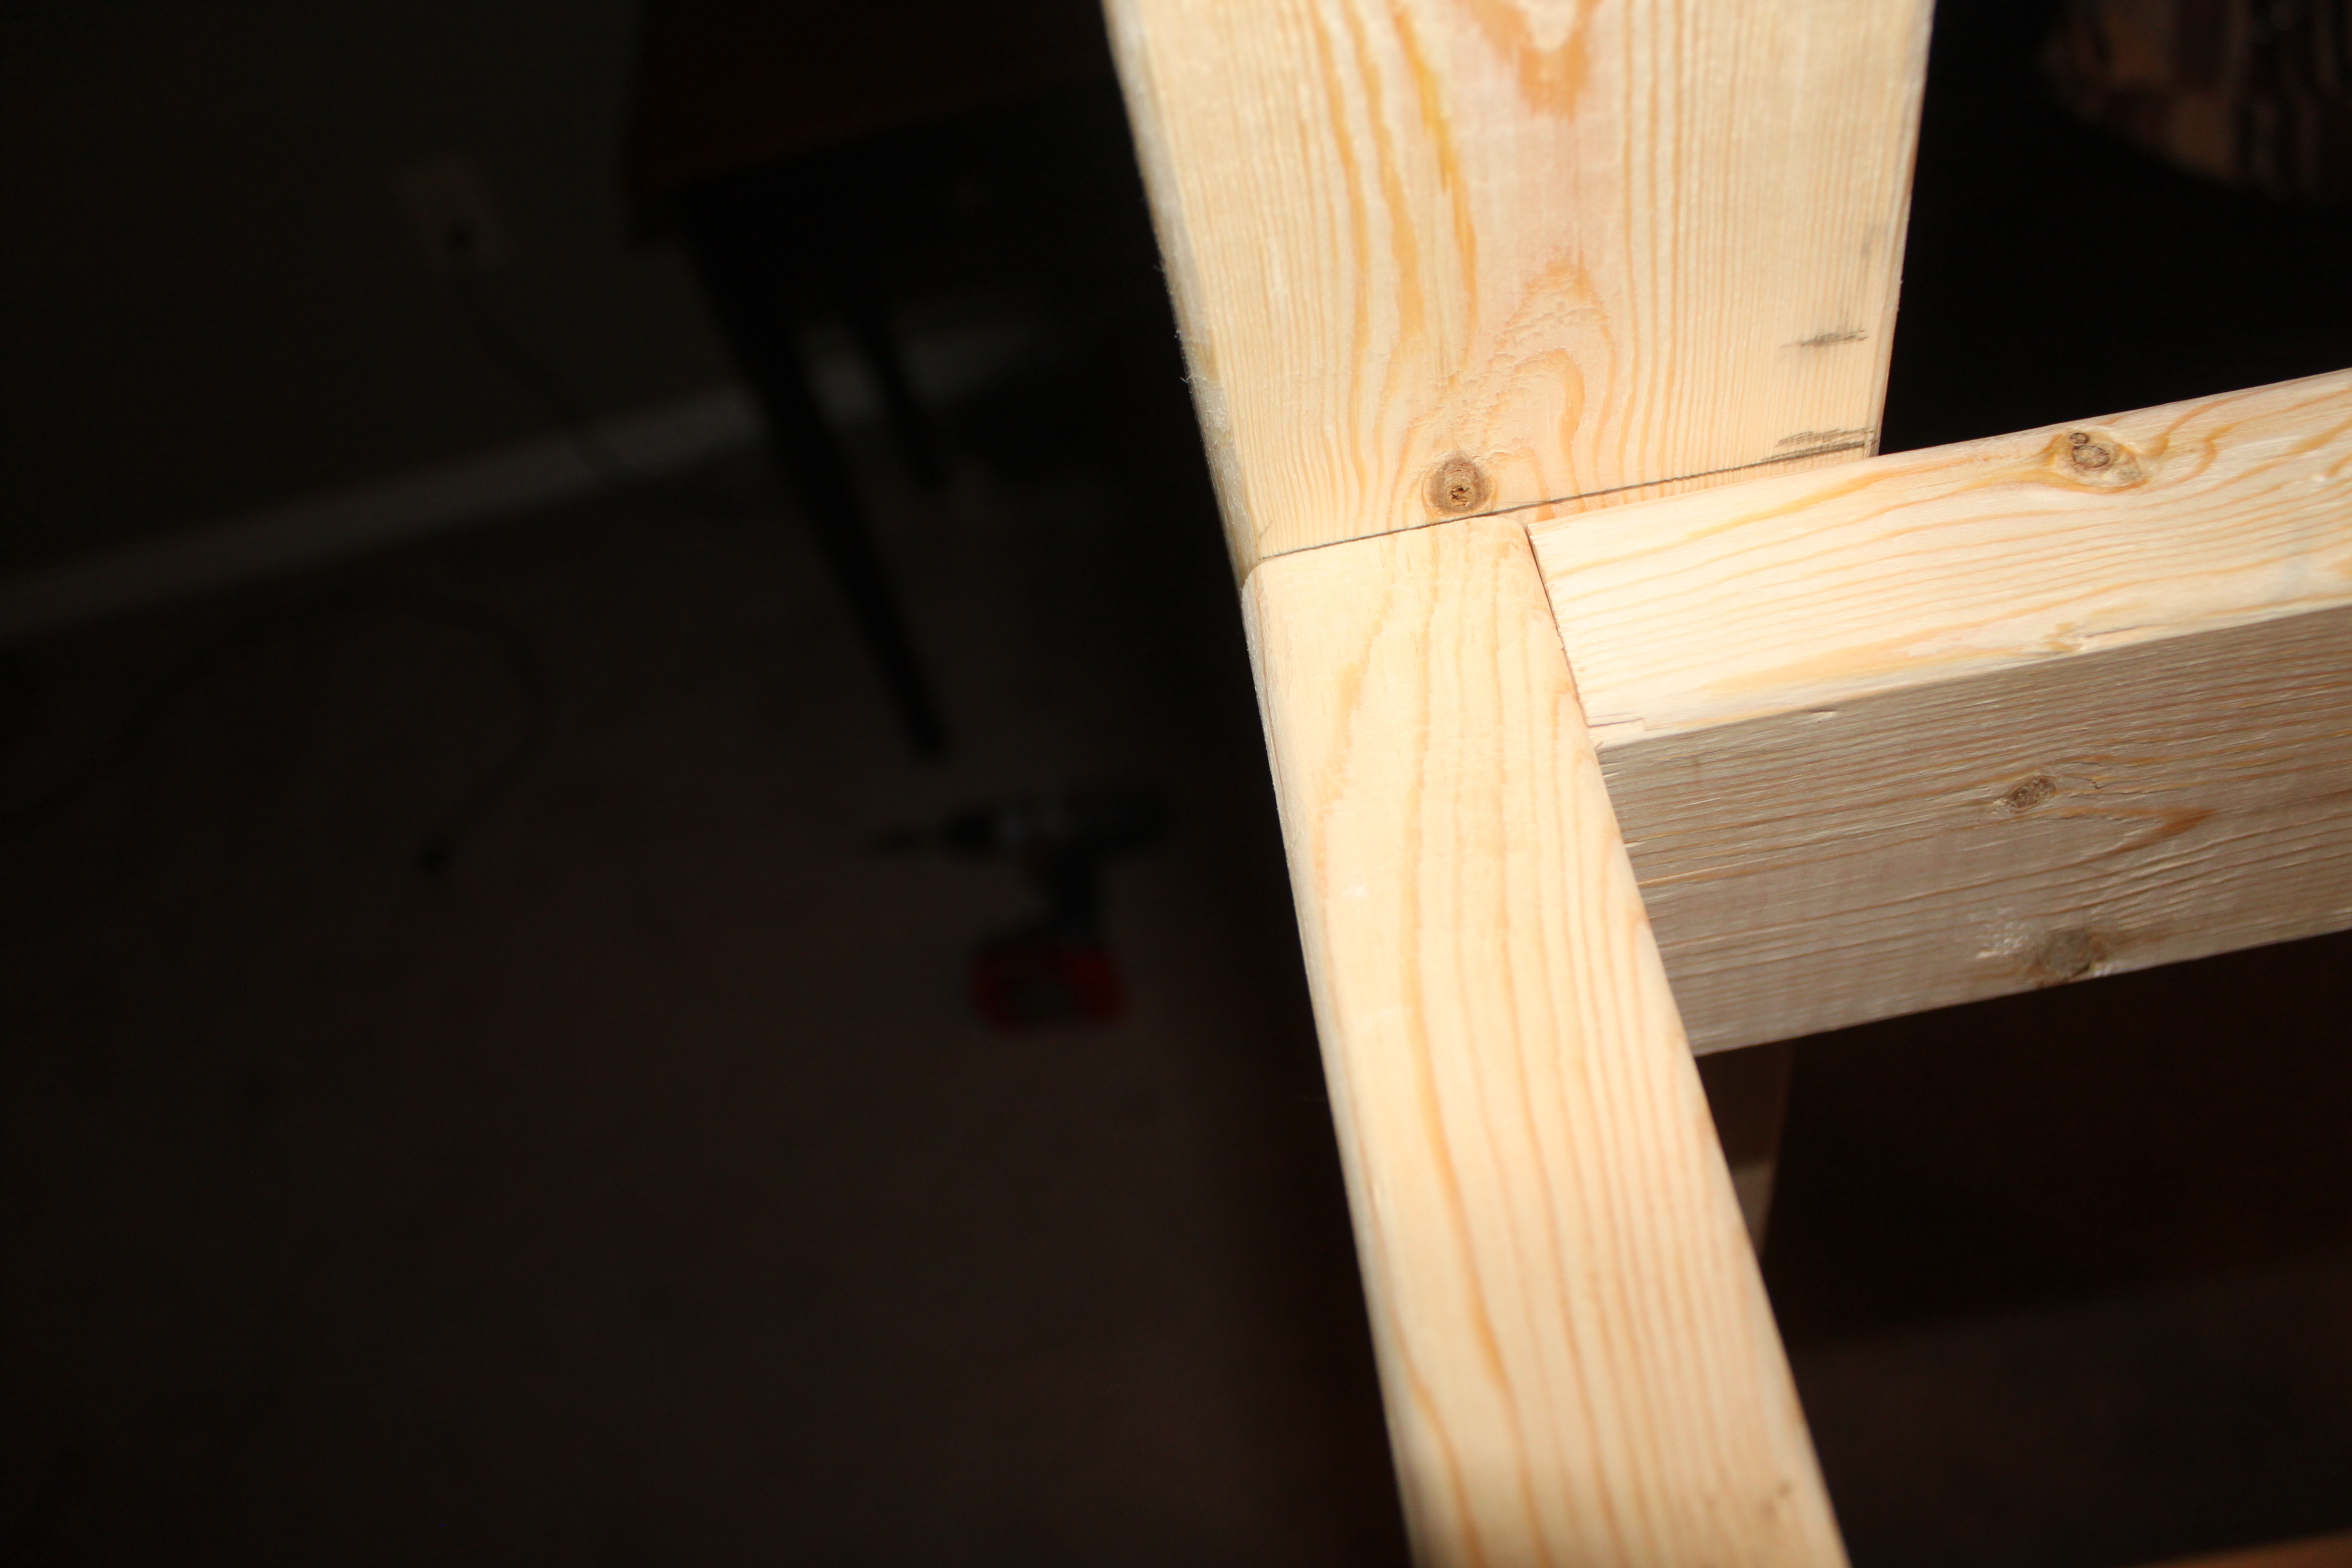
Close up of the rectangle shelf supports attached to the post. We attach 4 screw on the outside of each shelf angle support to add extra strength to each
Four screws are driven in to the outside of each post at every shelf corner
Side View of the shelf supports
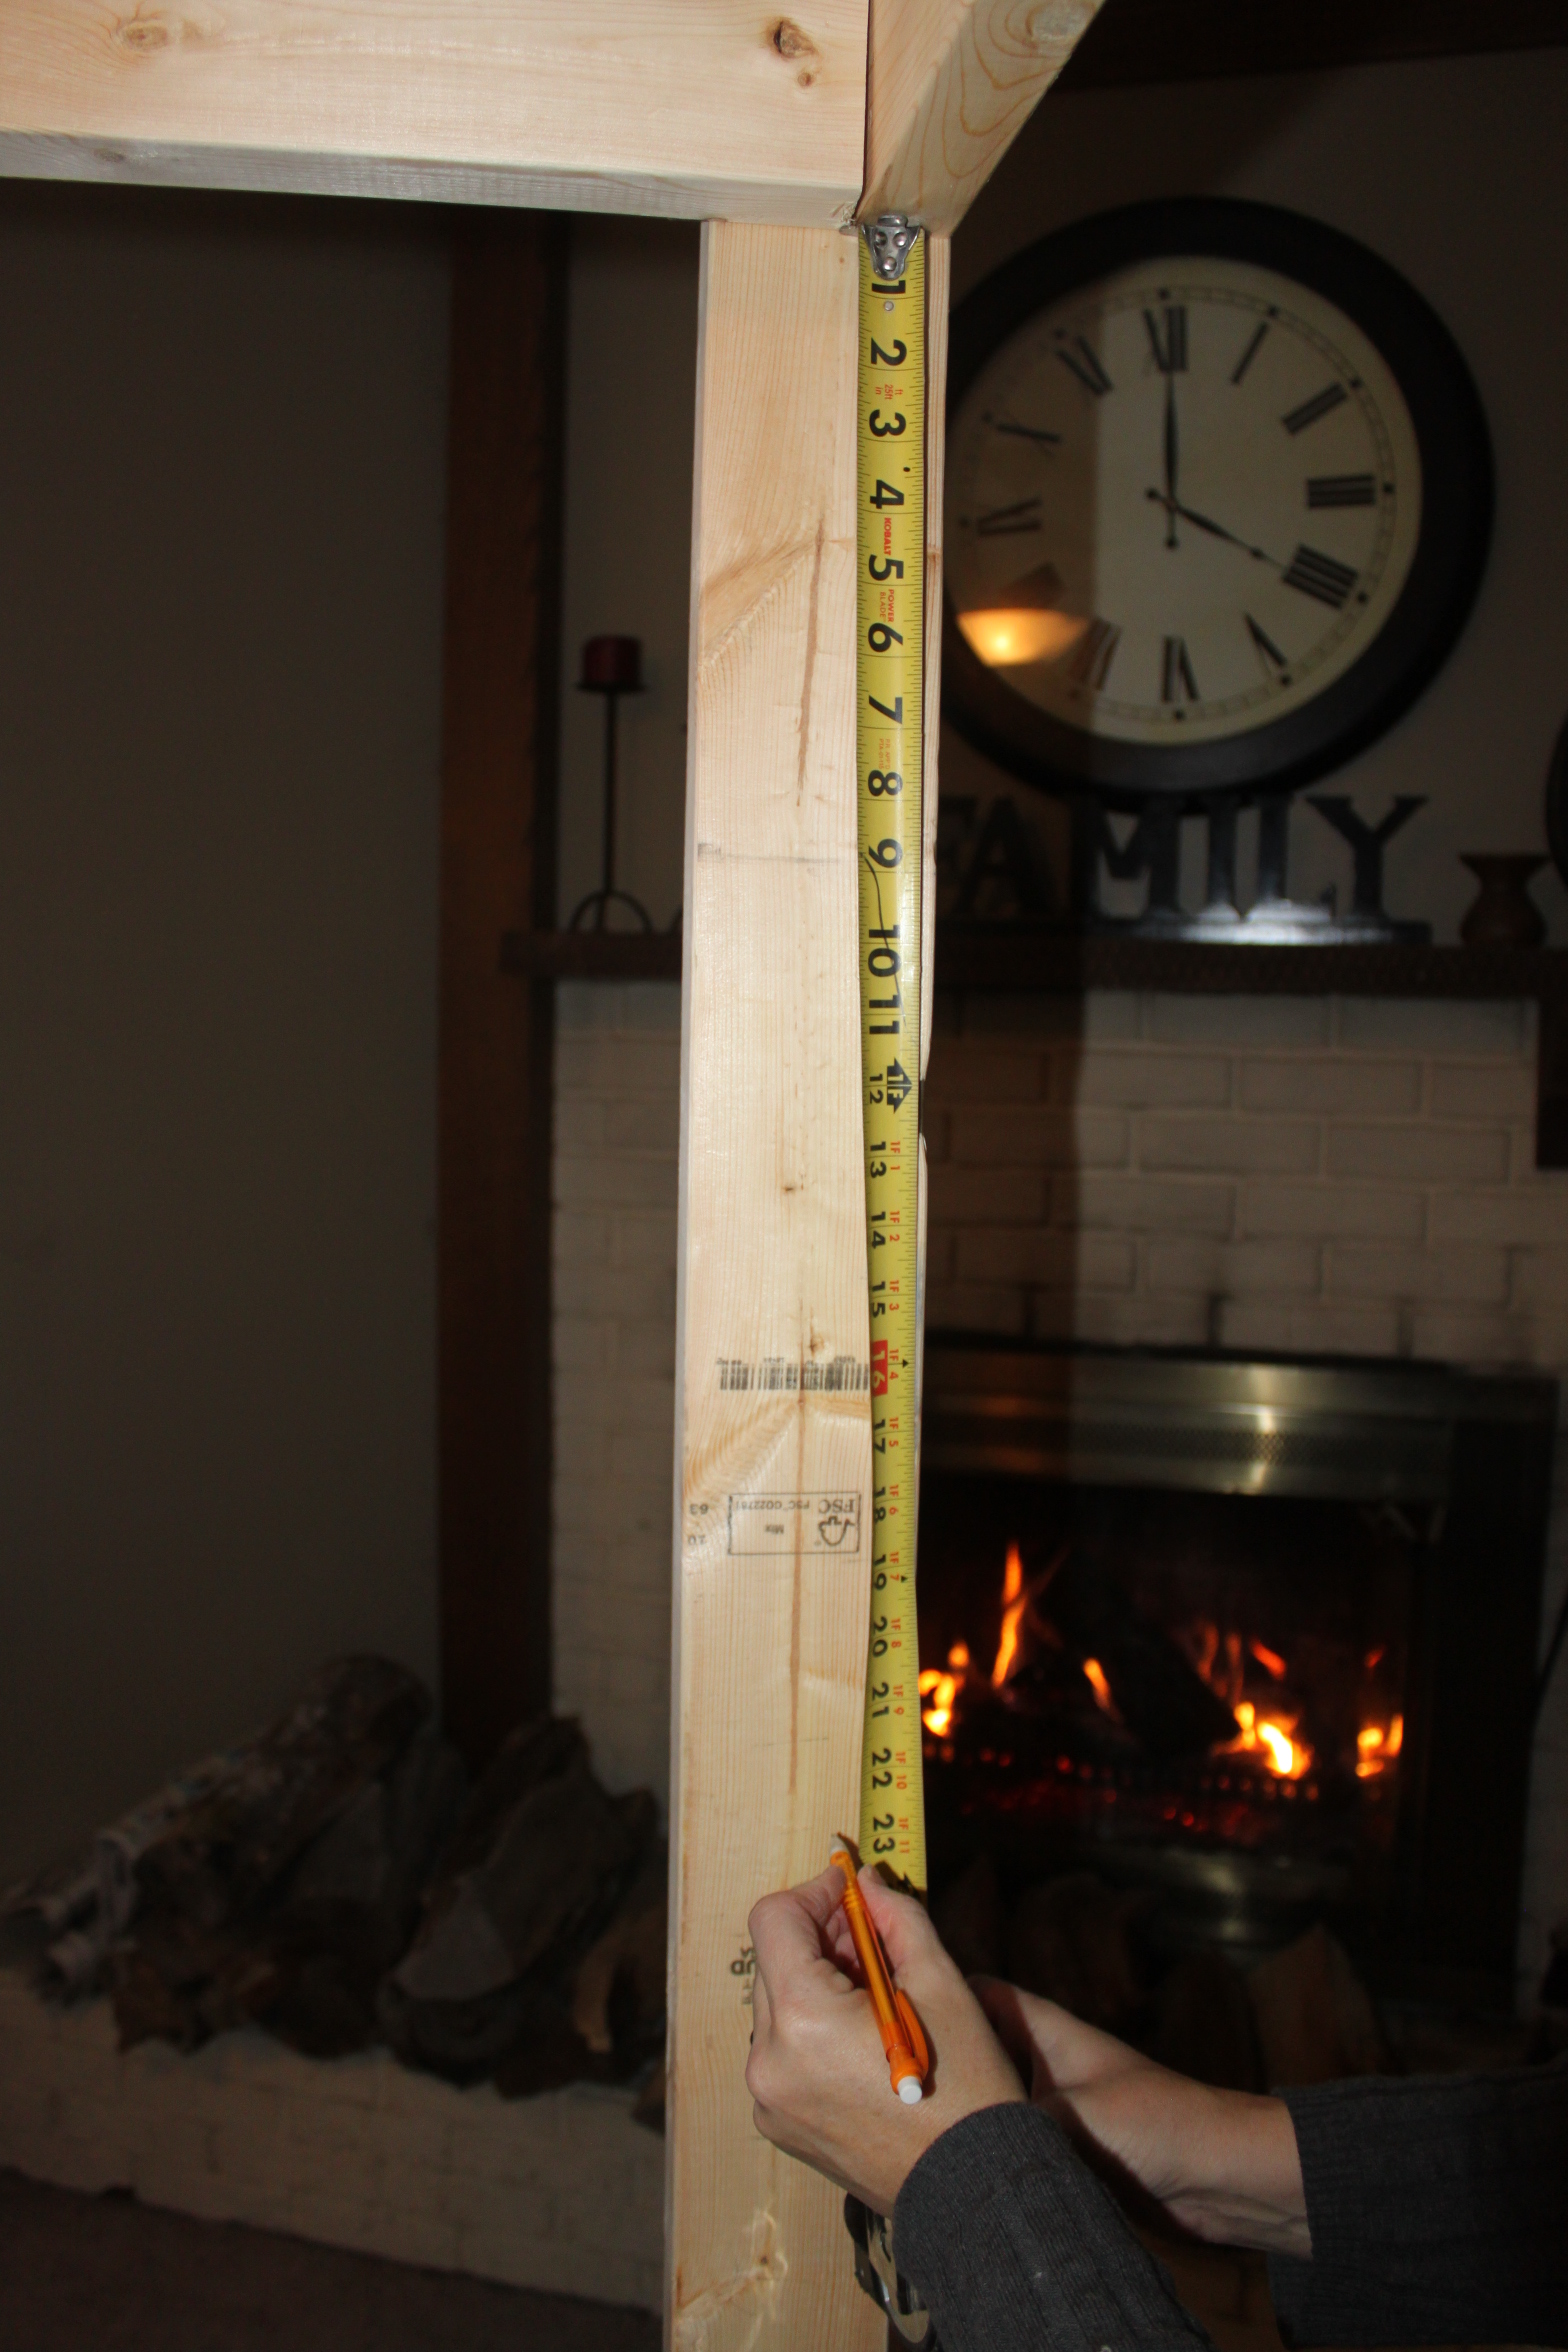
Measuring Down For The Shelves
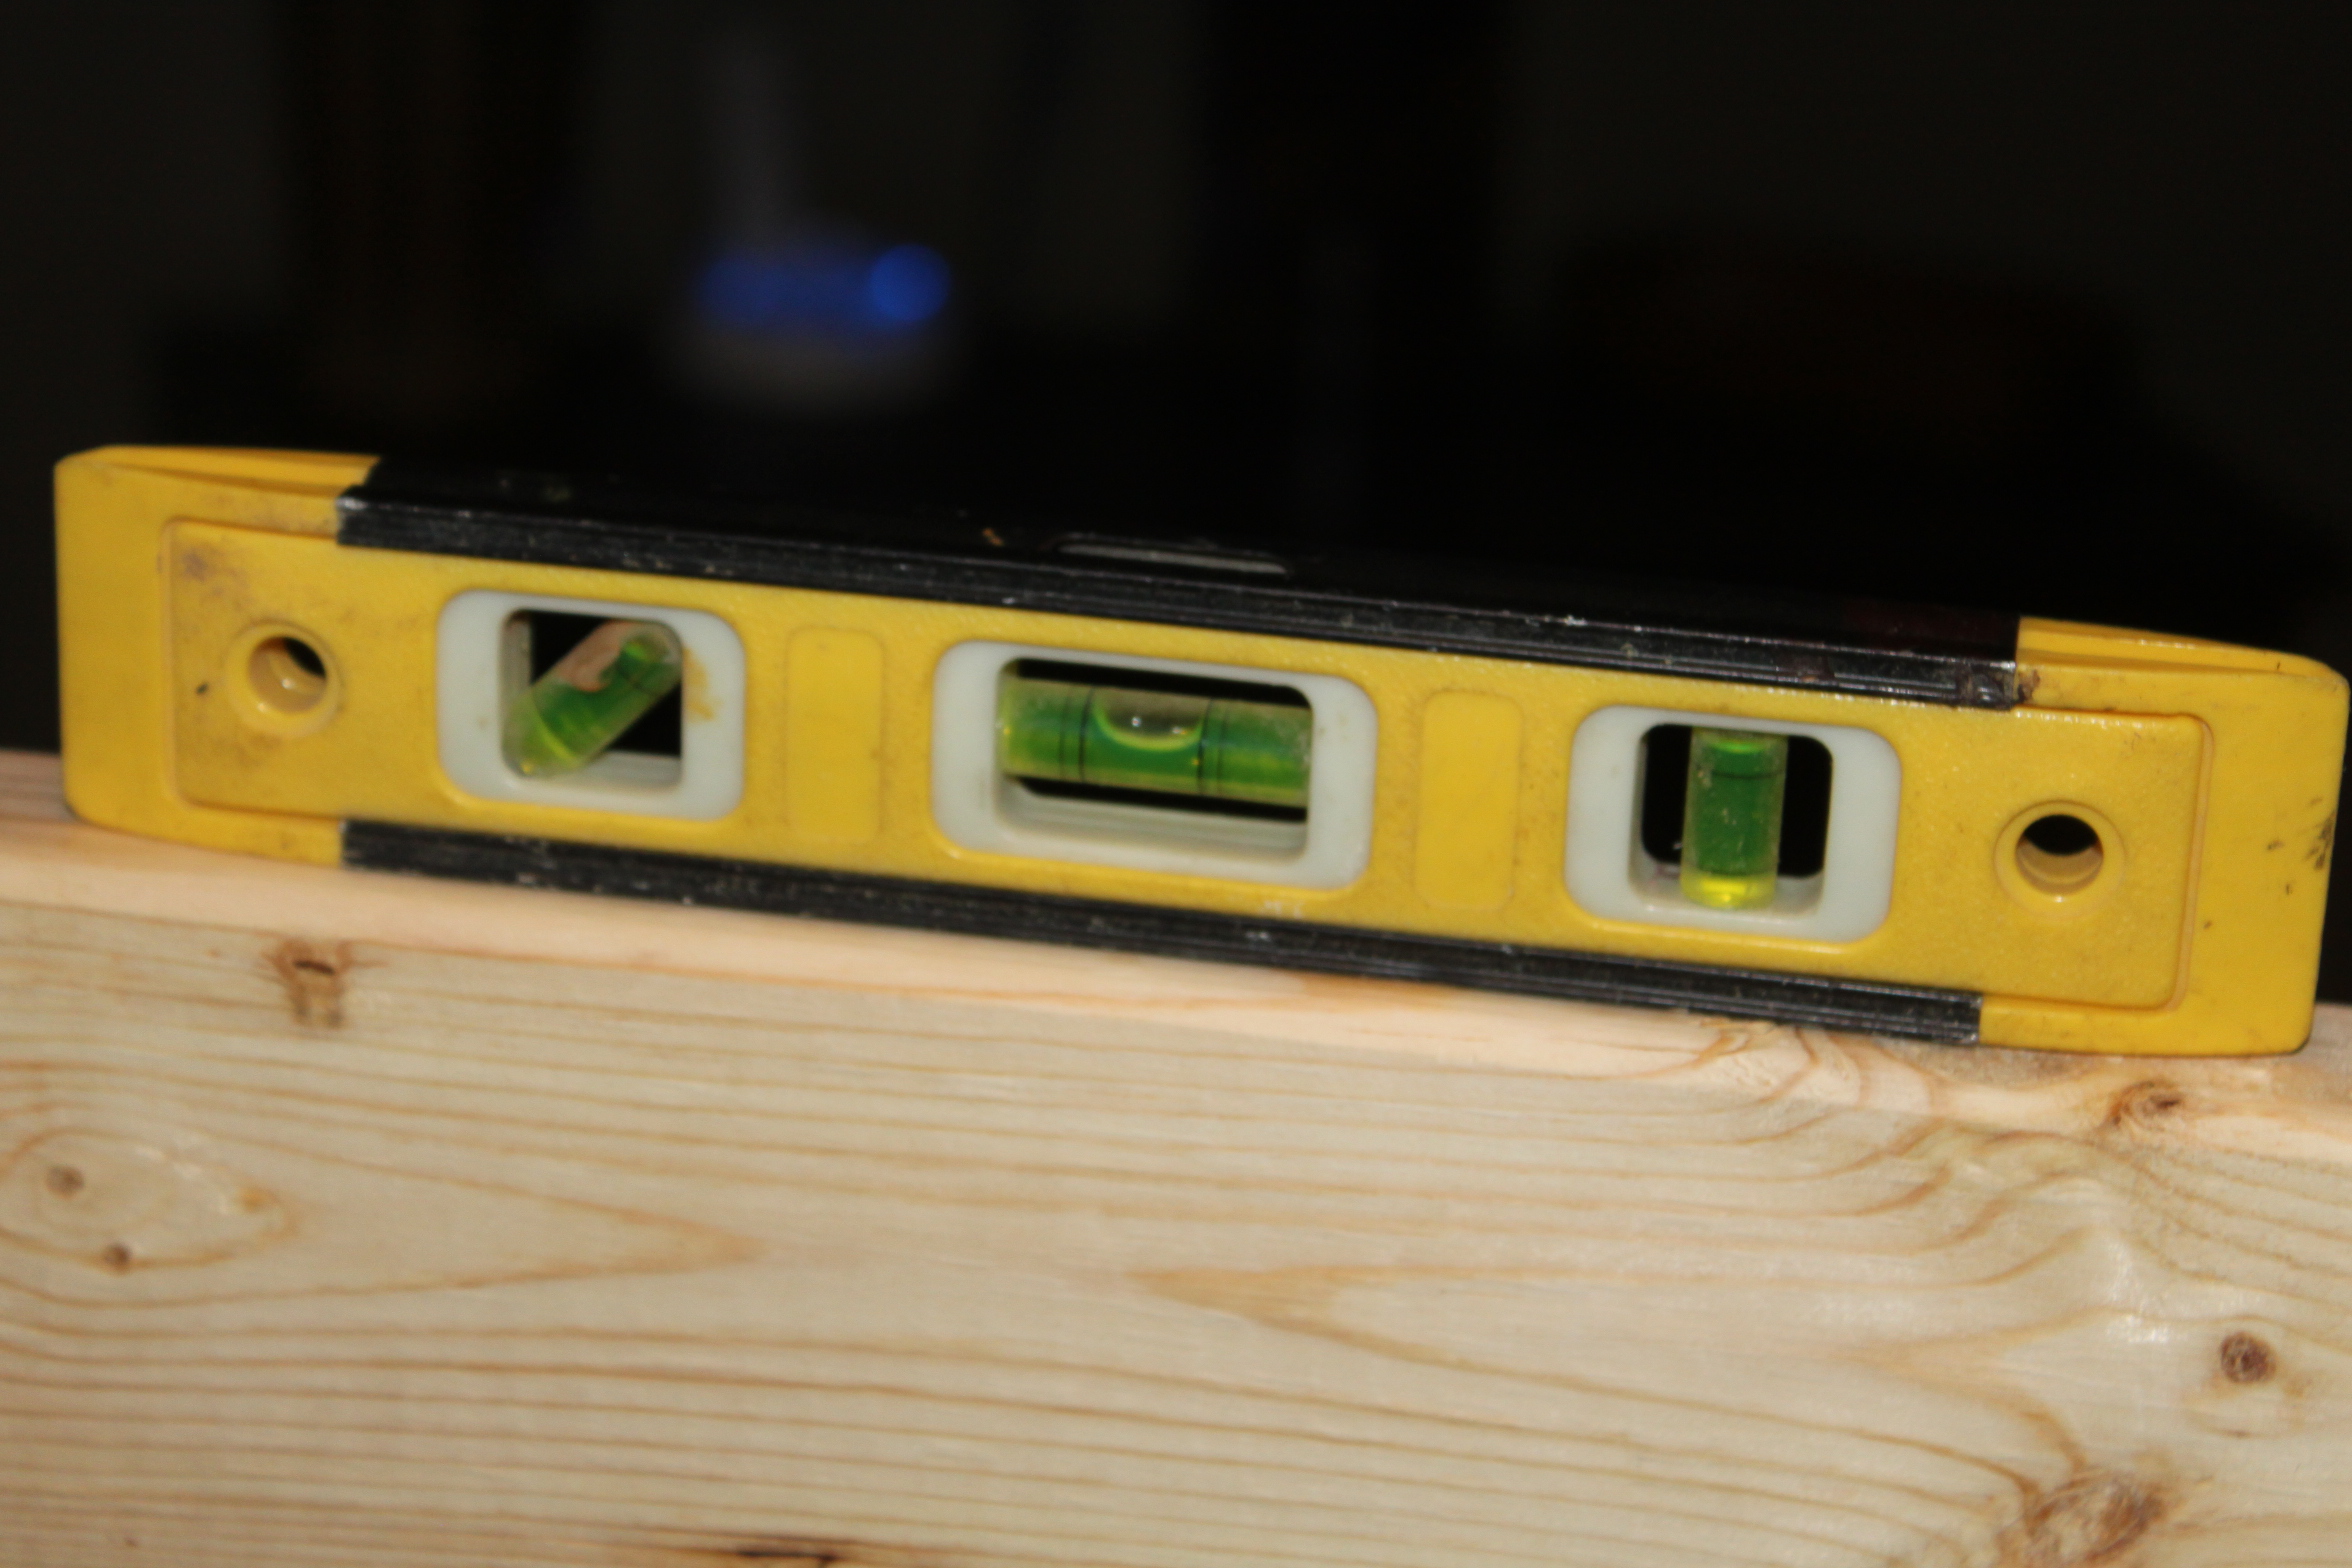
Use a level to make sure your shelf supports are level when attaching


Nice looking seedling rack. I'll be building this in the next few weeks.
ReplyDeleteYour camper will be waiting!Cover & Rack
ReplyDelete